I made a T-shirt
“Back in the ’90s, I was in a very famous TV show…”
Last autumn, while waiting for season six of the Netflix show Bojack Horseman to be release, I sat down and started to work on an T-shirt design. Specifically one related to the show.
The show has great dialogue, good story and manages to be both funny and sad at the same time. It weird that a show with several main characters portrayed as animals, feels more real than most of the other shows I seen. I love it and as a fan, I wanted to own a Bojack Horseman themed T-shirt. And because I am who I am, I wanted to designed it myself.
The result is an image of the main character Bojack looking sad.
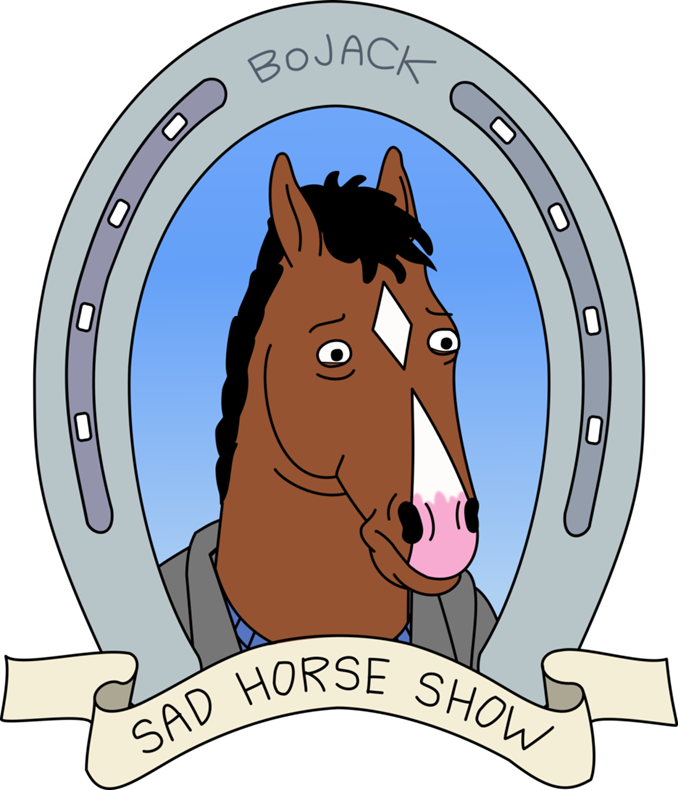
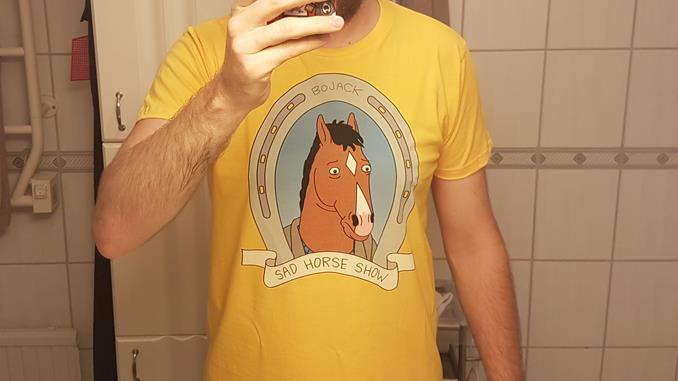
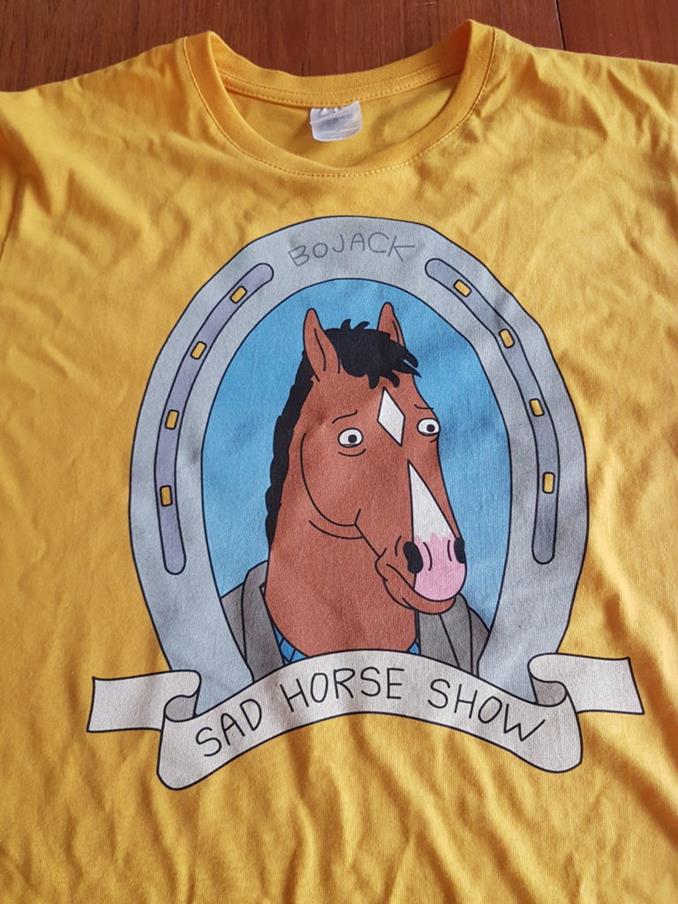
Below is the preview the printing site gave me and a picture the actual result. I selected a yellow shirt to print on because I didn’t own any other yellow shirts.

It might be hard to see at first, but the yellow from the shirt is showing through a little. Which has shifted the tone of the the brown part a bit. A little disappointing, but the shirt is still nice.
If I was to print this again, I would select a different color or maybe try with a higher priced shirt to see if that would make the print look better.
How it was made
The image was made with in Inkscape, a vector graphics tool. Vector graphics means that the images can be scaled to any size and still look sharp. A very useful feature for when planing on sending it to a printer.
The image of Bojack was made by tracing a screen shot of an episode. The ribbon and horseshoe was made by hand after studying examples on the internet.
The text was traced from letters in the credits so it would be in the same font as used in the show. The ribbon and text was made to arch like a frown so it would reflect the general mood of Bojack.
Features used
As I’m fairly new to Inkscape, I had to learn some new stuff in order to create this print. To spread the knowledge (and have something for myself to go back to in case I forget), I would like to highlight four features I had to learn and use for this project.
“Last used style” setting.
The tracing was made with the Pencil tool. It was pretty annoying to use at first because it always went back to the same color selection. But I was very happy to find out that there exists a setting that makes it keep the last used style. You can find the setting in a window that appears when you double clicking on the tool icon.

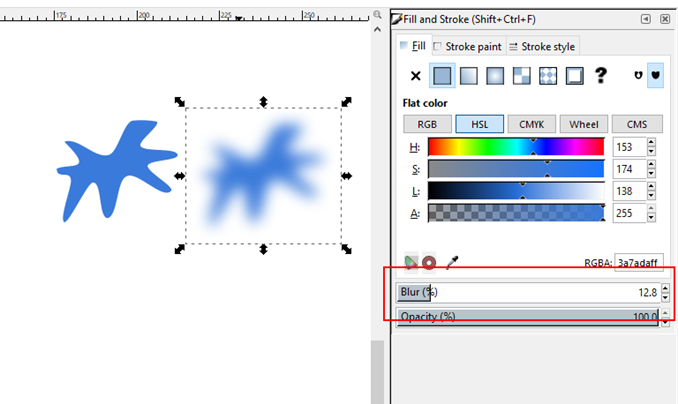
Blurry shapes
On Bojack’s muzzle, I wanted the pink part to blur a little over the white area. To achieve this effect, I adjusted the Blur slide that can be found in the “Fill and Stoke” panel. To find this panel, click on menu option “Object” and then on on “Fill and Stoke”.
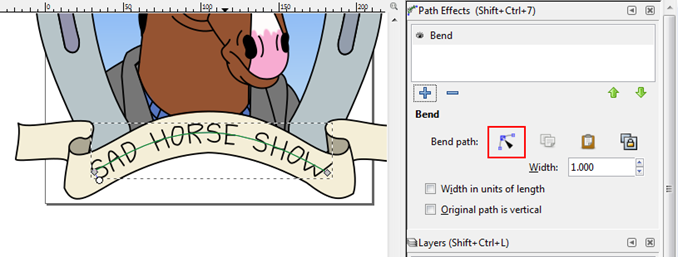
Path Effect - Bend
I wanted to ribbon to arch and to get the text to follow the arch I used the “Bend” path effect on it. It can be applied to a selected path/object by opening up the Path Effects panel (found under Path menu), then adding “Bend” by clicking on the + button and lastly clicking on icon next to “Bend path:” to get a path to modify.
The Linear Gradient Fill
I have used the Linear gradient fill before this project, but I keep forgetting exactly how to use it between sessions. So I had to relearn it again.
The Linear Gradient Fill is first selected for an object under the Fill tab in the “Fill and Stroke” panel (open under Object menu). Then the gradient is edited by selecting the “Edit path by nodes”-tool and selecting the two nodes inside the selected object.

It was fun making my own design. I don’t know what I’ll design next, but I do know I want to make more of them. /Henrik.