Map of Middle Earth

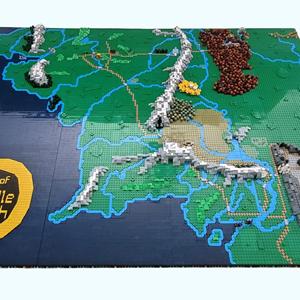
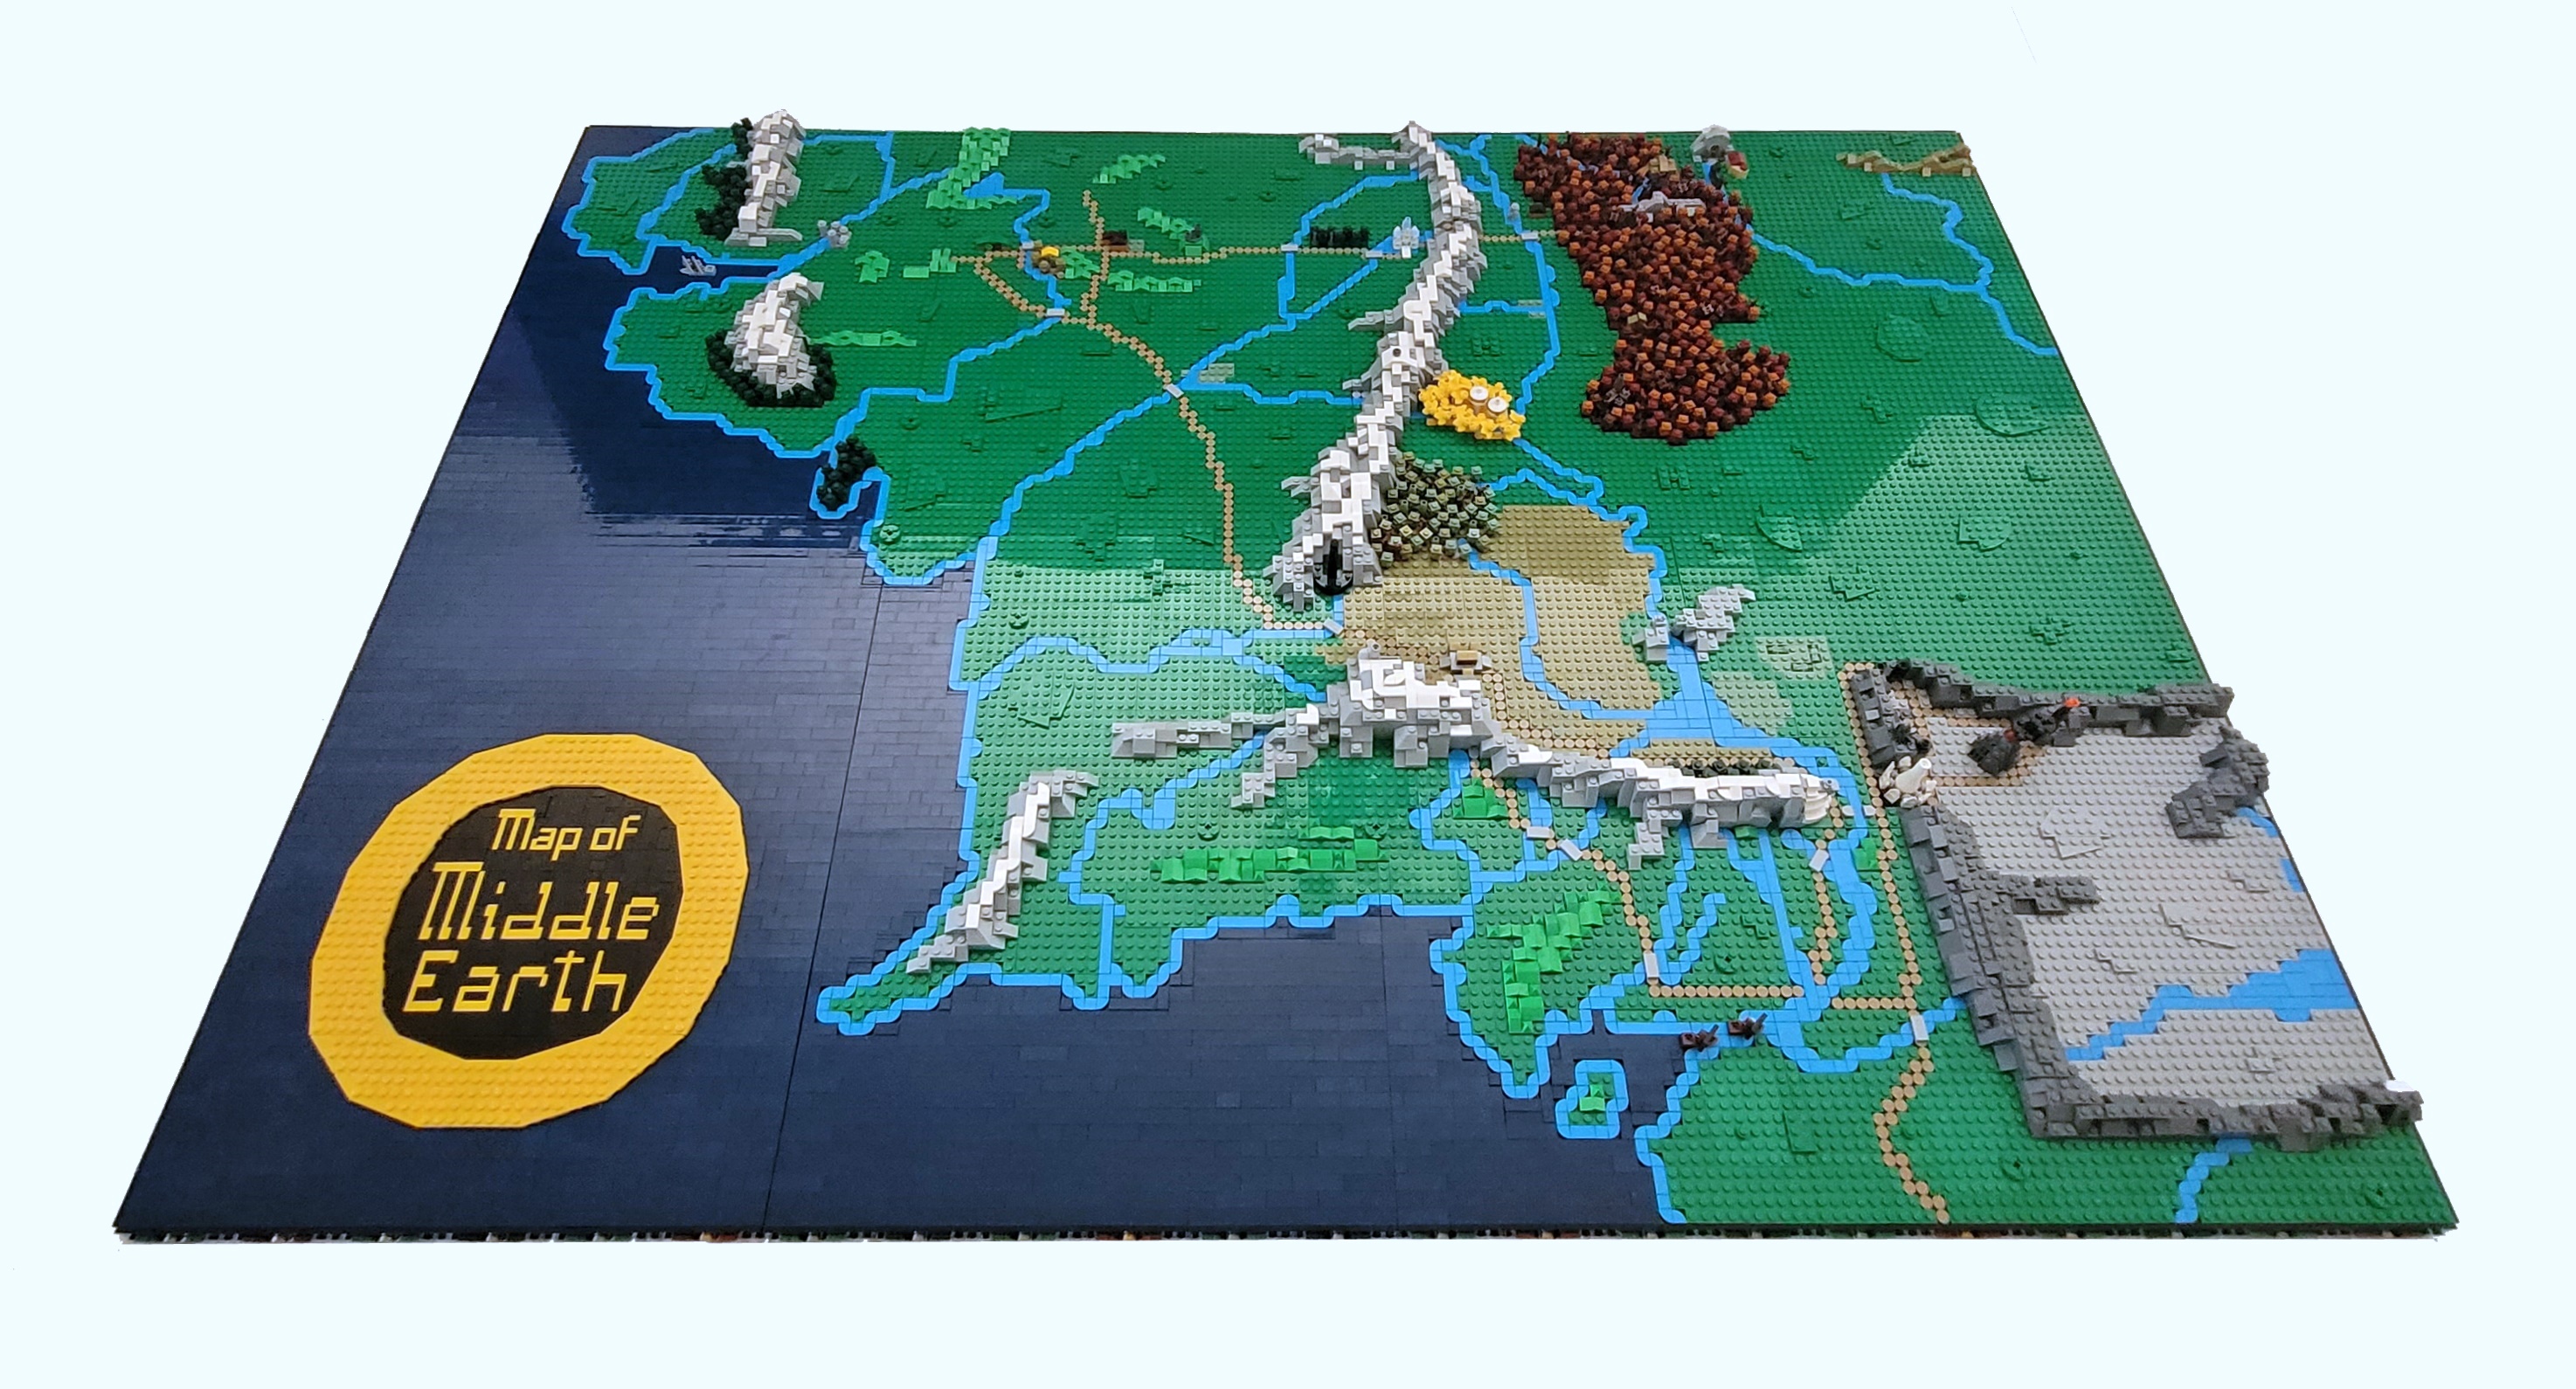
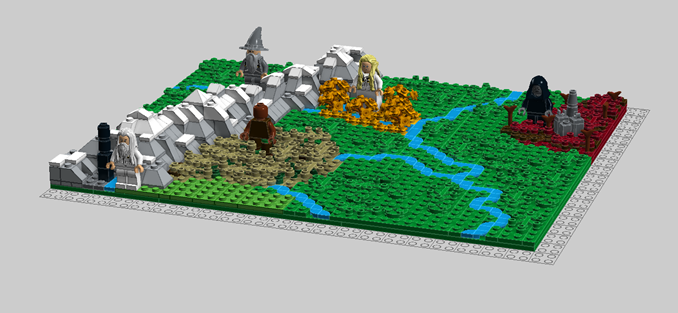
This year I have finally completed my Map of Middle Earth. AS you can see here here, I started the project about 2 years ago. At that time I had hoped to complete the map within a year, but it took me an extra year to get it done. (I had a project or two that got in the way.) So it feels nice to be able to now present the finished result.

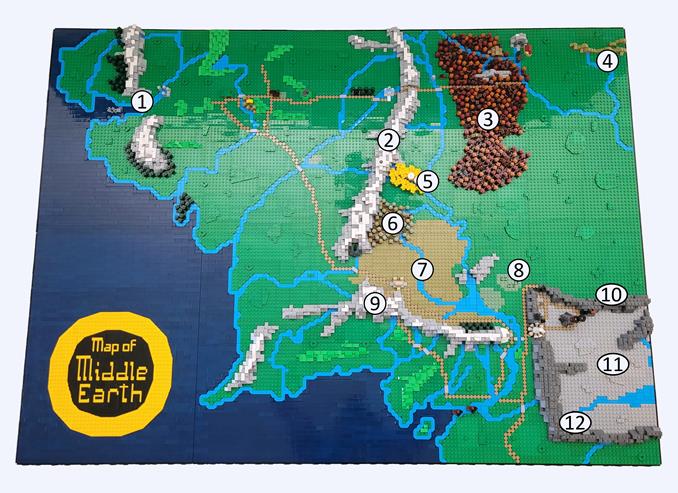
The Map shows the important part of Middle Earth, the part that Bilbo and the Fellowship journeys through. From the Gray Harbour in the north-west to the mountain of doom in the south-east.


These pictures can be viewed on Flickr and Instagram too.
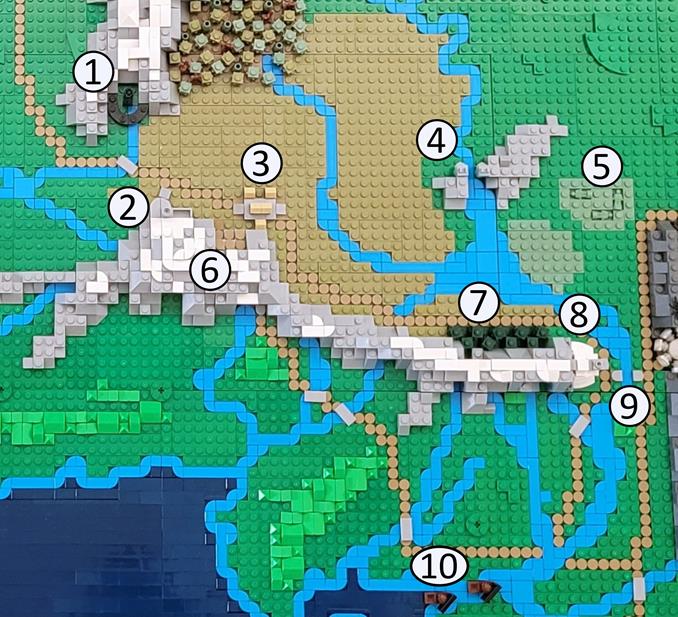
Locations
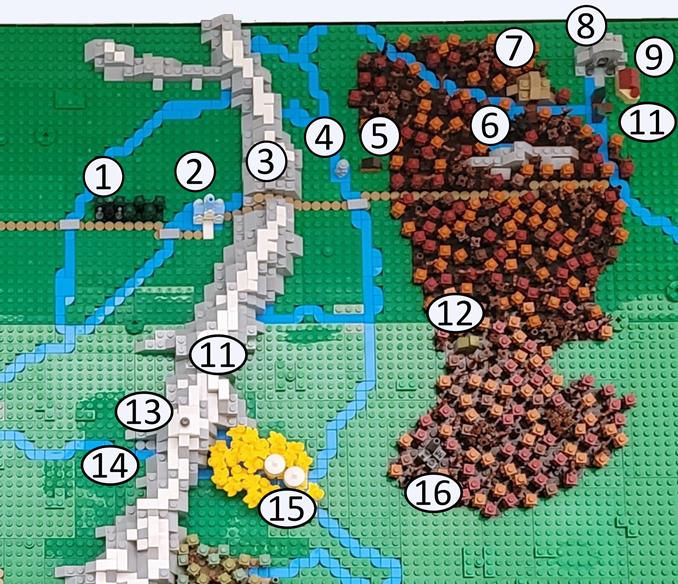
The map is filled with small builds that highlight various locations that are visited (or mentioned) in the stories. I have made a small build for all of the locations I could think of to highlight.
- Blue Mountains
- Misty Mountains
- Mirkwood
- Iron Hills
- Lothlórien
- Fangorn Forest
- Rohan
- Dead Marshes
- White Mountains
- Ash Mountains
- Mordor
- Mountains of Shadow
(The are more regions, roads and rivers to name, but I decided it would be to much clutter to mark out those too)

- Grey haven
- The Shire / Bag End
- Underhill (Tom Bombadil’s house)
- Bree
- Weathertop
- Barrow-downs
- “Mr Bilbo’s trolls”
- Rivendell
- The High Pass (and entrance to Goblin-town)
- Eagle’s Eyrie
- Beorn’s Hall
- The Great Spiders
- Elvenking’s Halls
- Erebor / The Lonely Mountain
- Dale
- Late-town
- The Pass of Caradhras
- Rhosgobel (Radagast’s house)
- Durin’s Tower
- Entrance to Khazad-dûm / Moria
- Caras Galadhon
- Dol Guldur
- Isengard
- Helm’s Deep
- Edoras
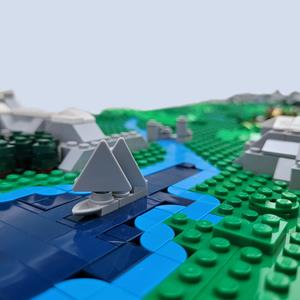
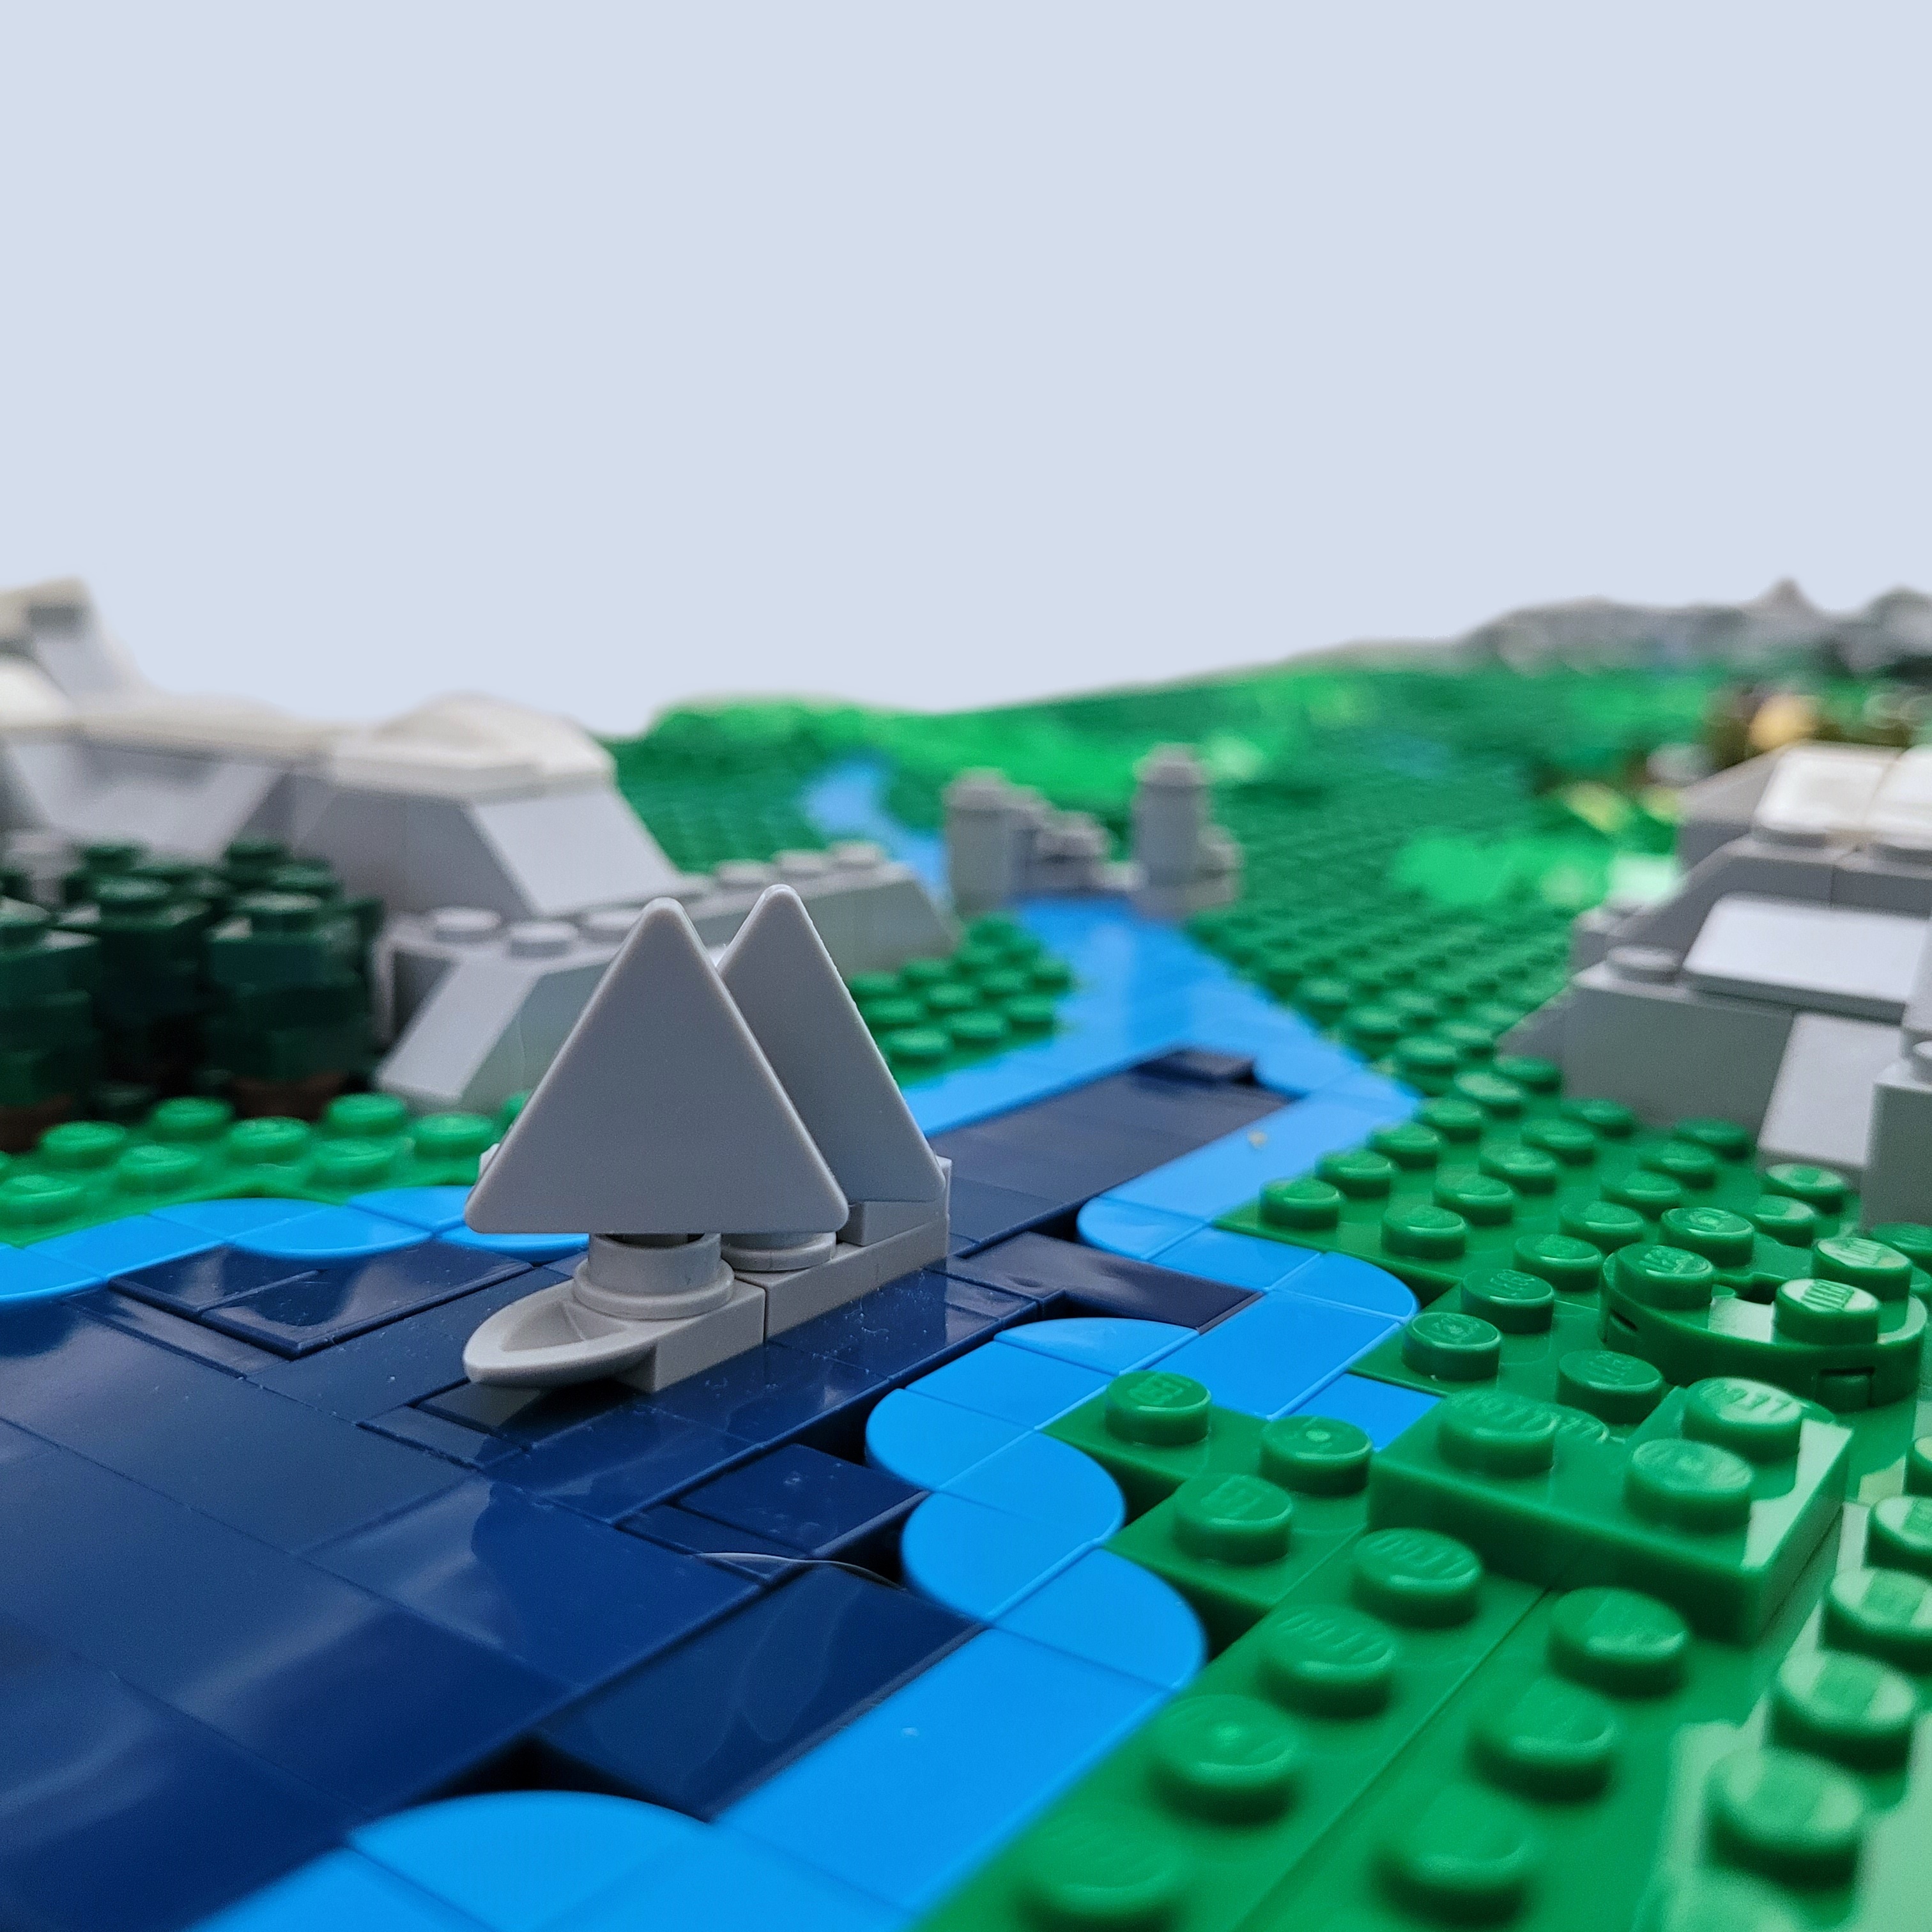
- The Argonath / Pillars of Kings
- Dead Marshes
- Stair of the Hold and Entrances to Paths of the Dead
- Drúadan Forest
- Minas Tirith
- Osgiliath
- Corsairs of Umbar
- Black gate
- Shelob’s lair
- Cirith Ungol
- Barad-dûr
- Minas Morgul
- Mount Doom
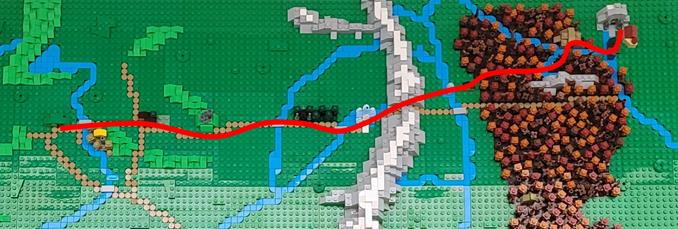
The journeys
Bilbo’s journey - From Bag End in the Shire to the Lonely Mountain.
Frodos’s journey - From Bag End in the Shire to Mount Doom.
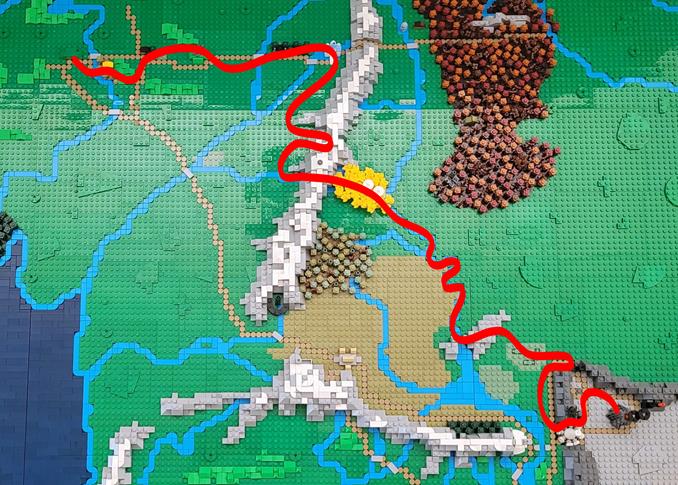
More paths can be view on this map made by the LOTR Project
About designing the build
Size
The size was the first thing I made a decision on. It needed to be affordable for me to build and practical to move to various exhibitions. It ended up being 176 x 128 studs (about 1.5 x 1 meter) in size. Any bigger than this and I would not have a table to build it on. It can be disassembled into 16 separate pieces, which all but one fits neatly into my LEGO moving boxes. The south-west corner is 48x48 studs in size and is transported separately in a bag.
The size was one of the reasons it took me so long to complete it. I could work on each section by itself. But I often needed the full picture of the build to get a good sense of if I were doing the right thing. And that required me to clear out space to work with, not something I always felt like doing.
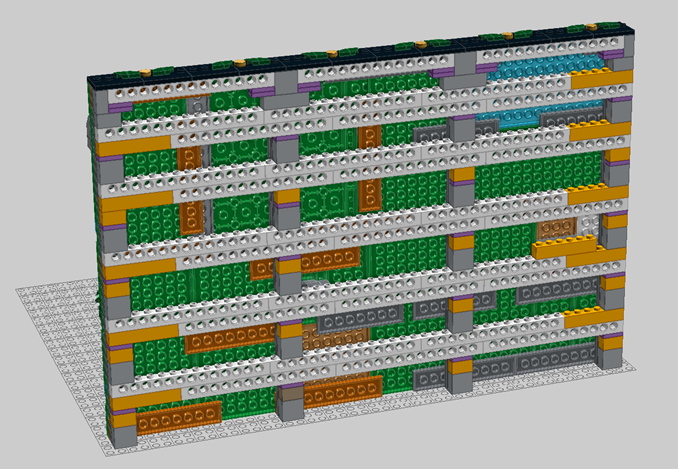
Frame/Border
I knew when designing the map that a few of the buildings would probably require some space underground to get the right orientation of the pieces. So I guess I would need at least 3-4 plates to get the SNOT right. (SNOT = Studs not on top. Meaning pieces had to be rotated.)
But I decided on making it a bit thicker than 3-4 plates and to use some of my many CMF 3 x 4 plates to make a border around the build. It gave me a perfect thickness to the base in my opinion.

This makes the height of the base as tall as 3 studs in length or 7.5 plates stacked. A choice that required me to make the inside of the build SNOT. So even though a large part of the visible build is “studs on top”, it is all resting on a layer of SNOT.
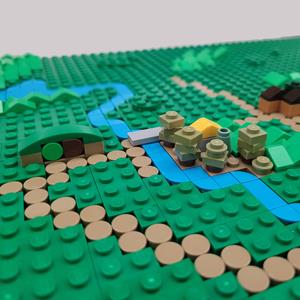
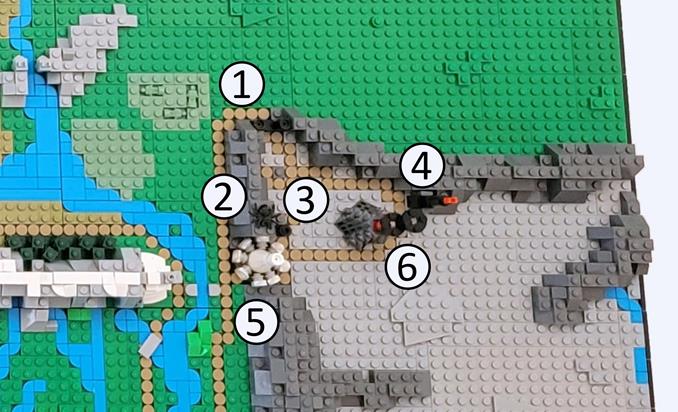
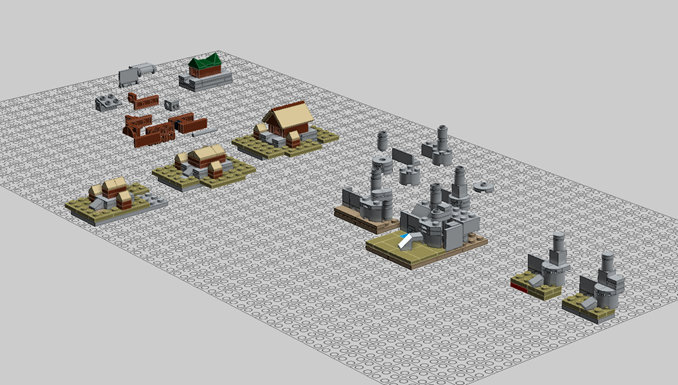
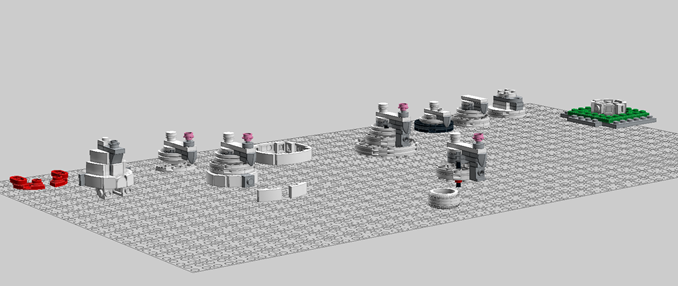
Buildings / Location markers
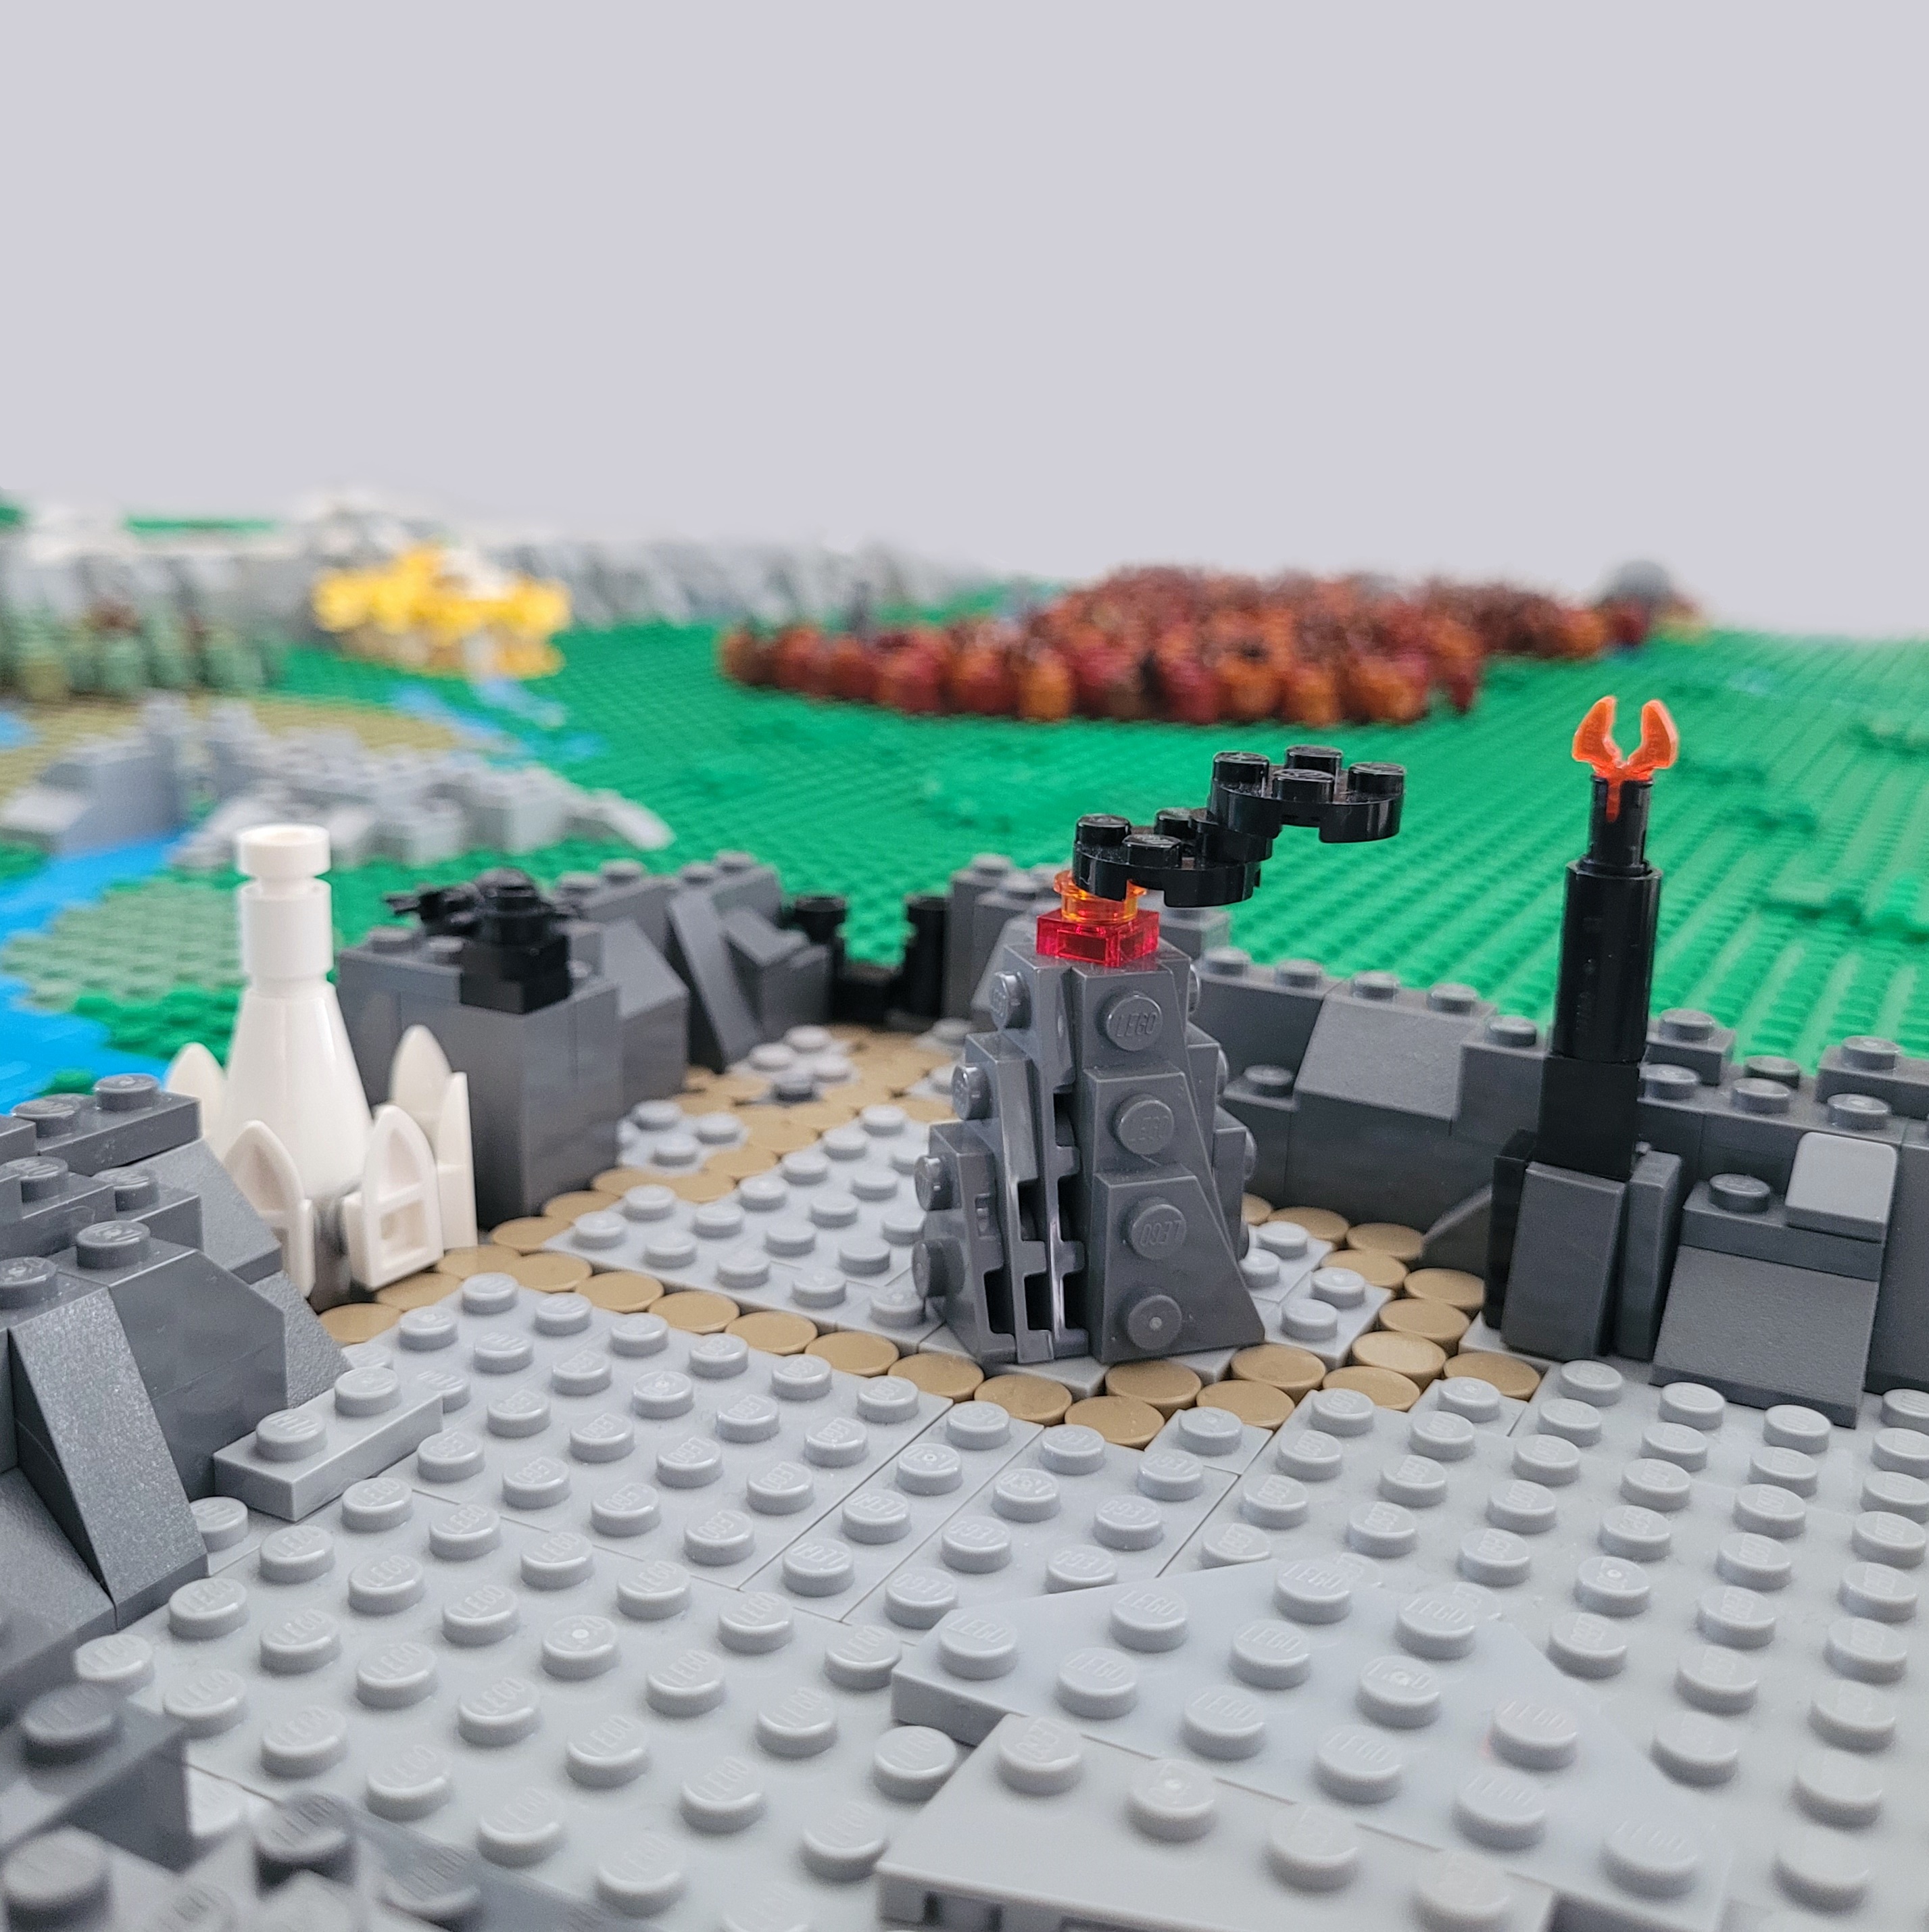
Marking out all the interesting locations on the map was a challenge. I wanted them as small as possible to not take up too much space on the map, but still look like what they represented. I had to stop at “good enough” on many of the builds to keep the size down.
Colors
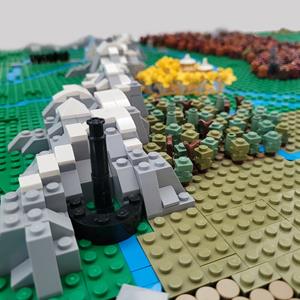
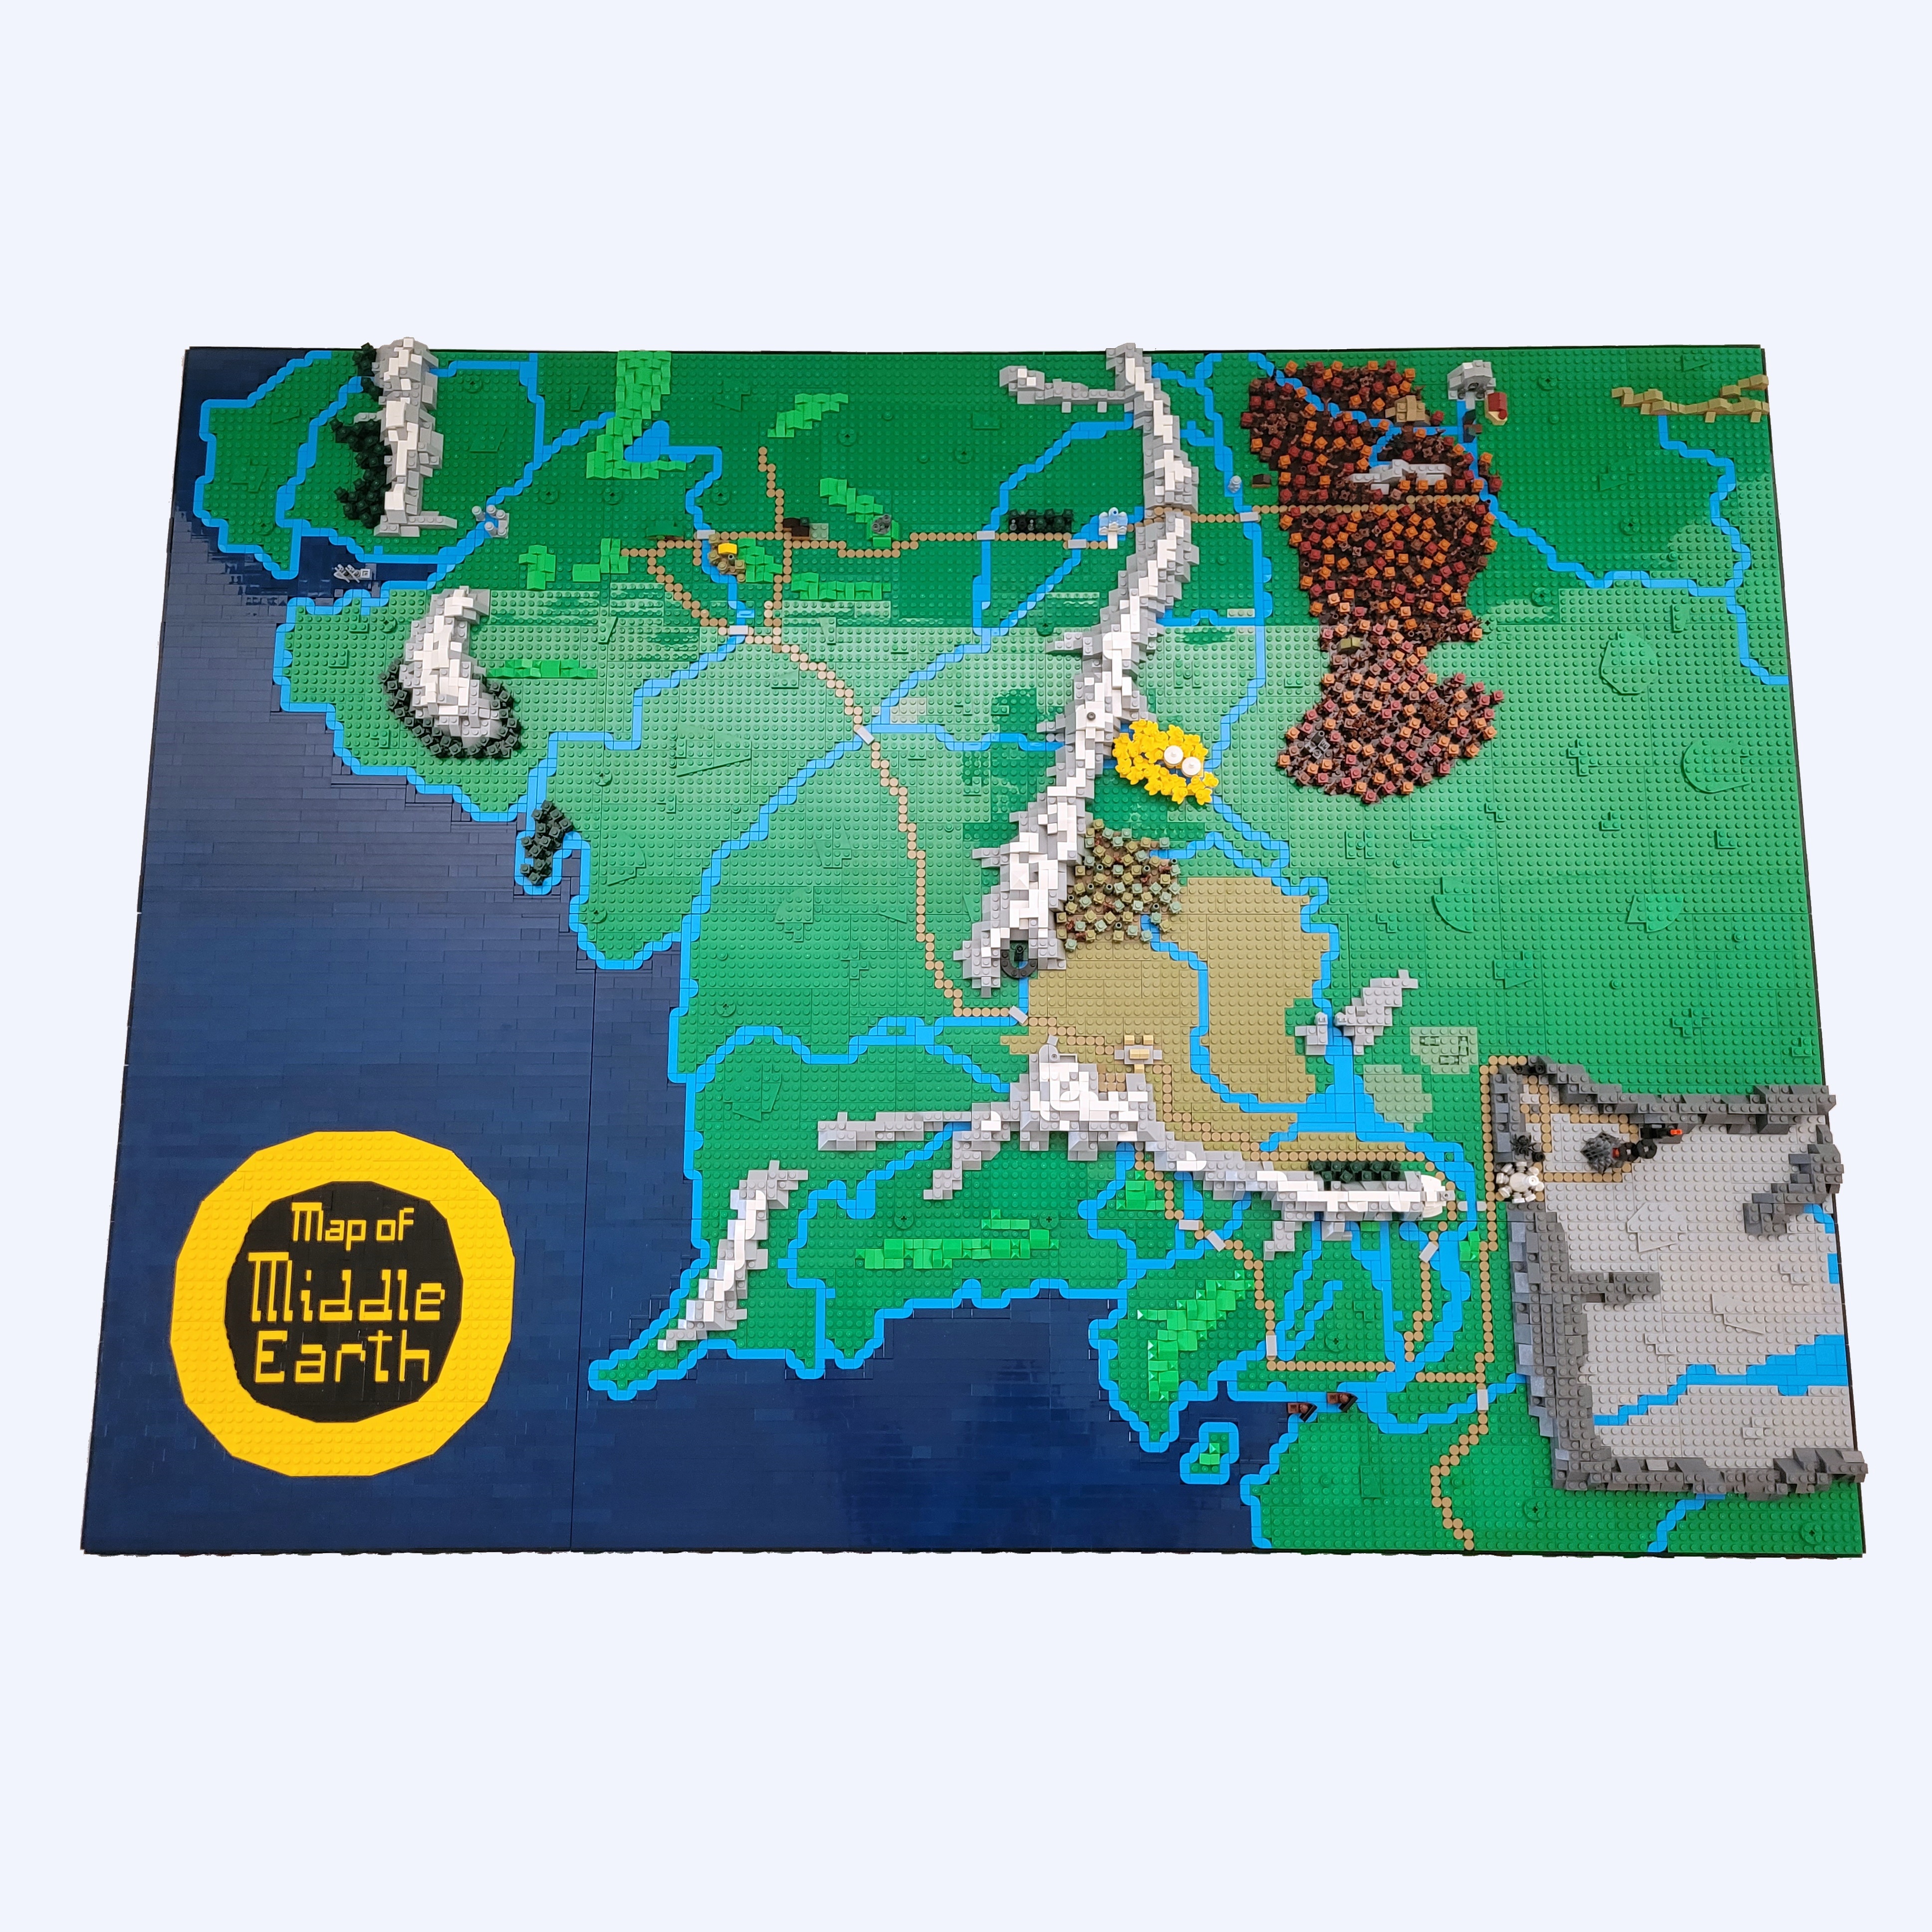
As maps usually do, my map also uses colors to distinguish different areas from each other. The main colors used are:
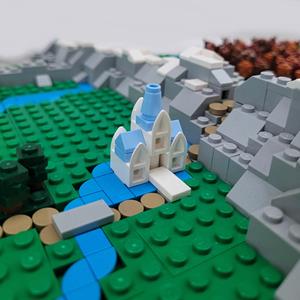
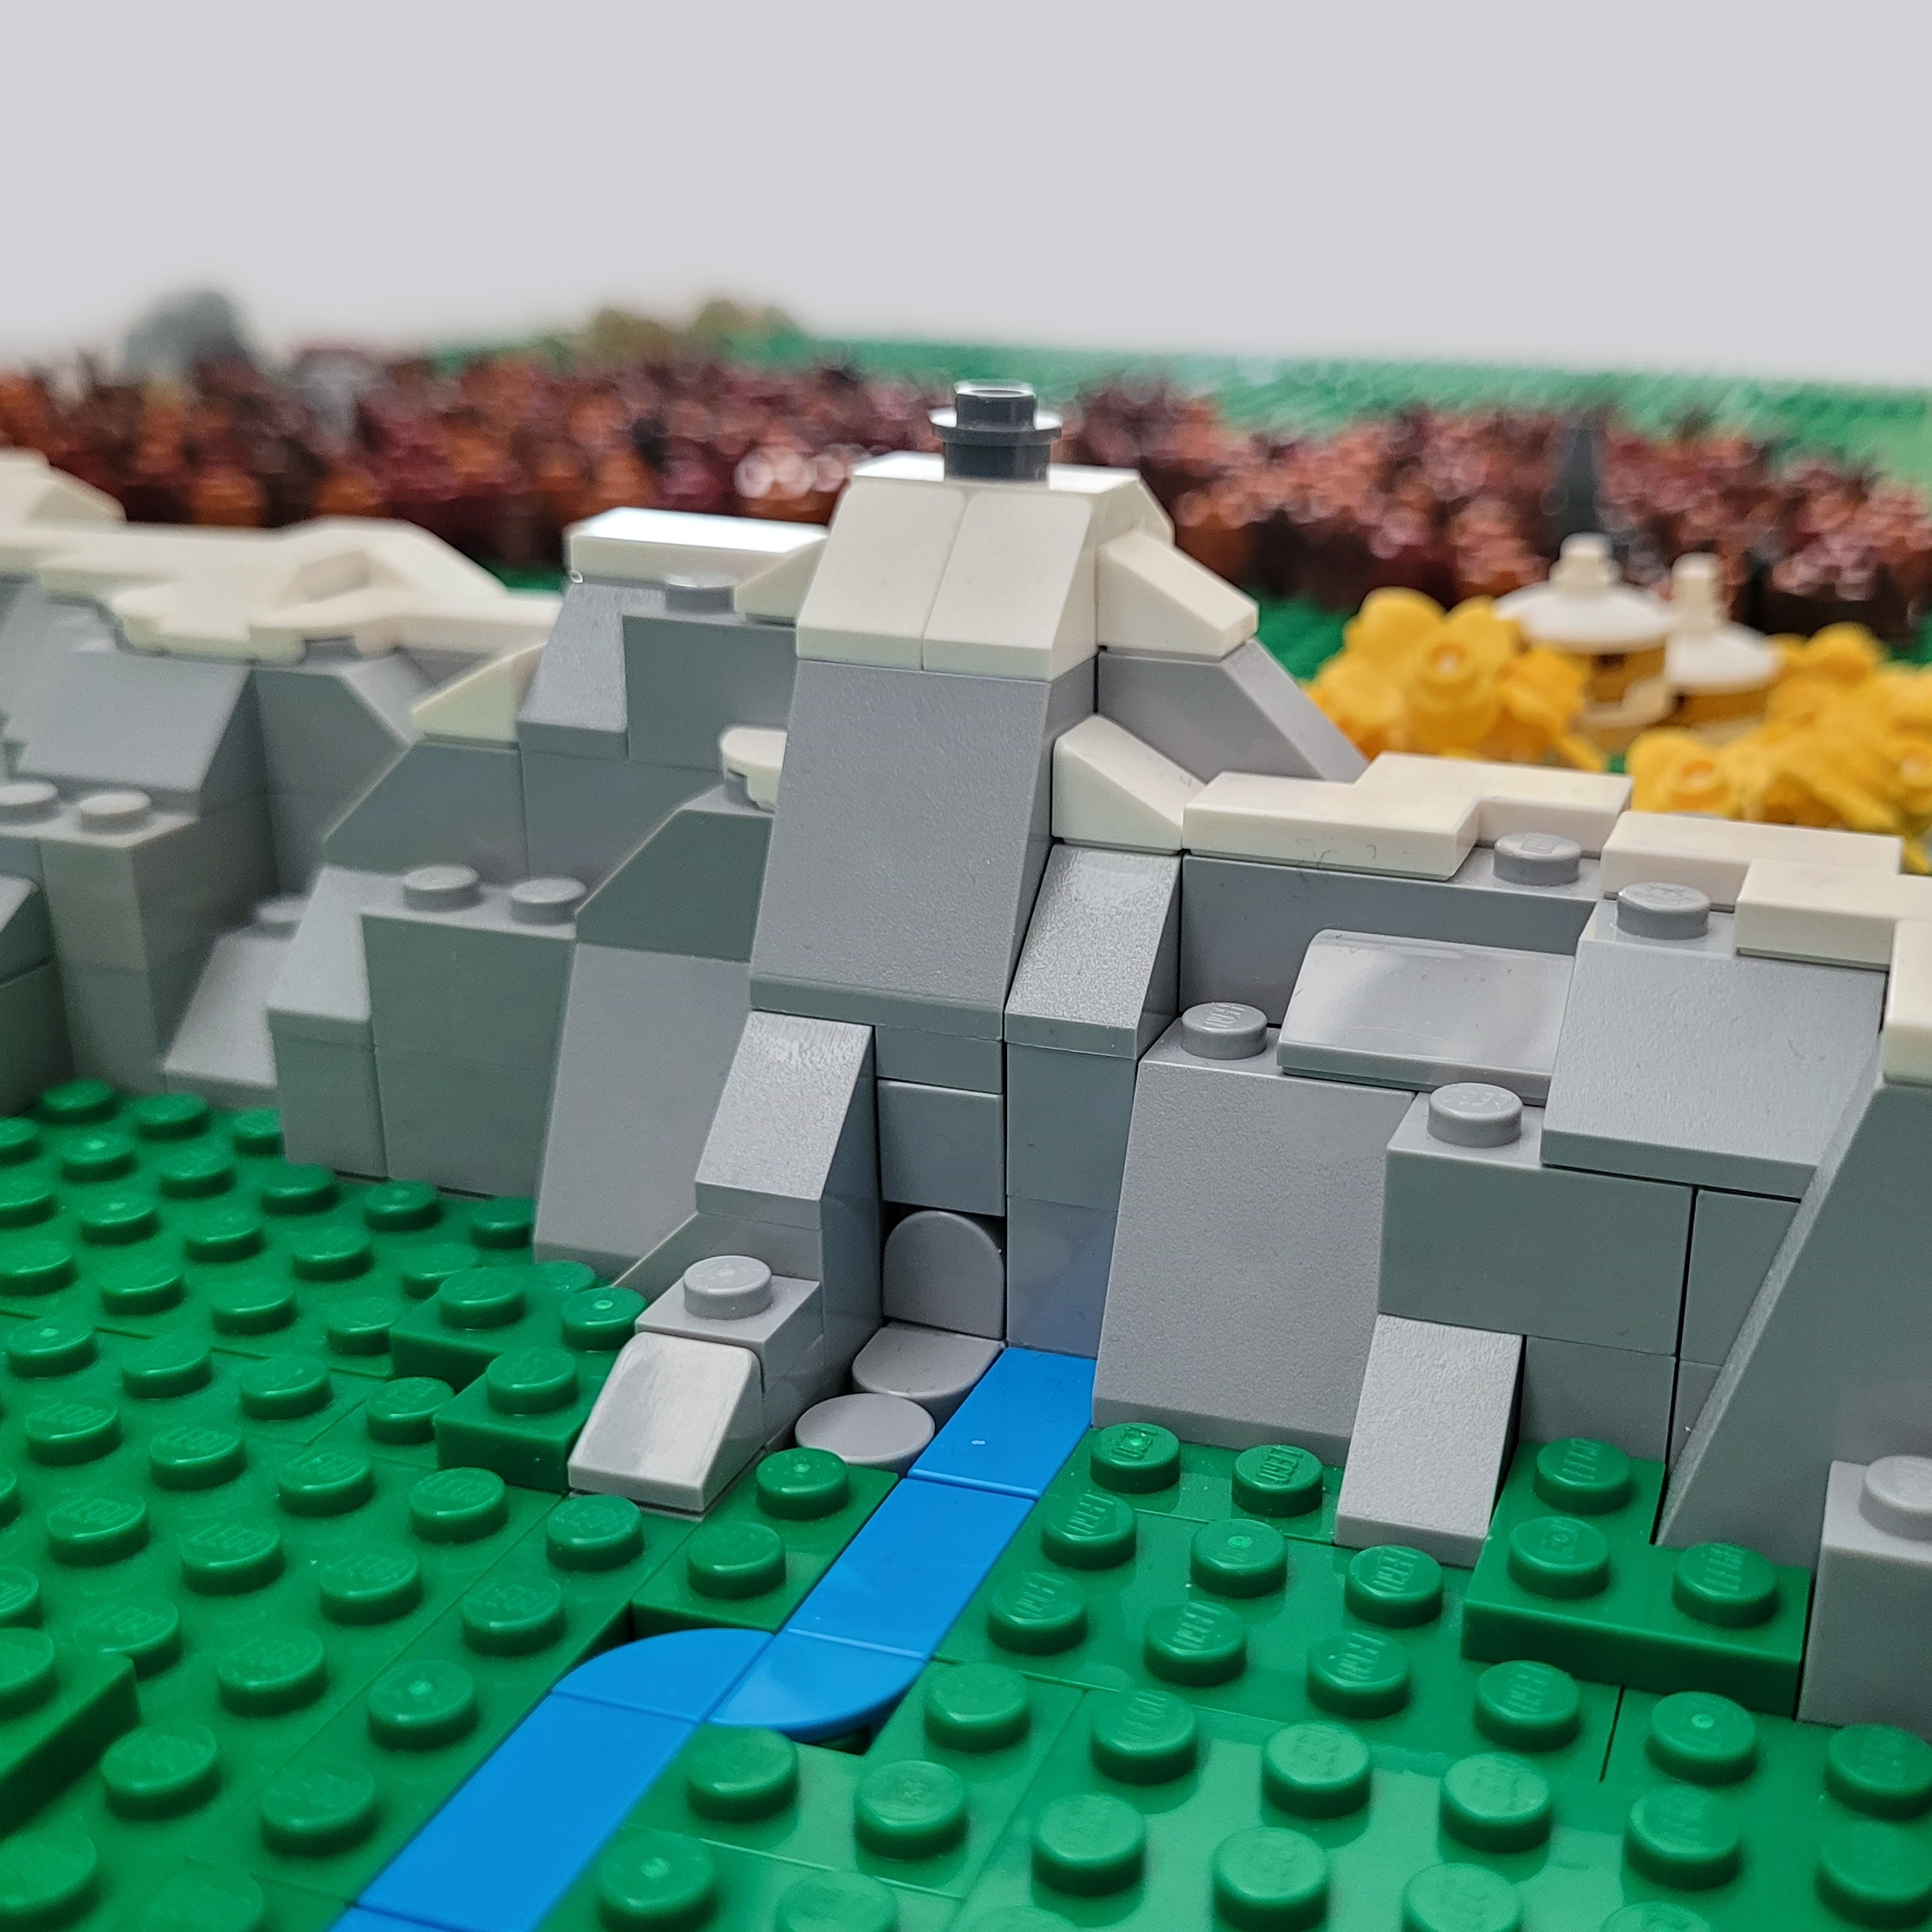
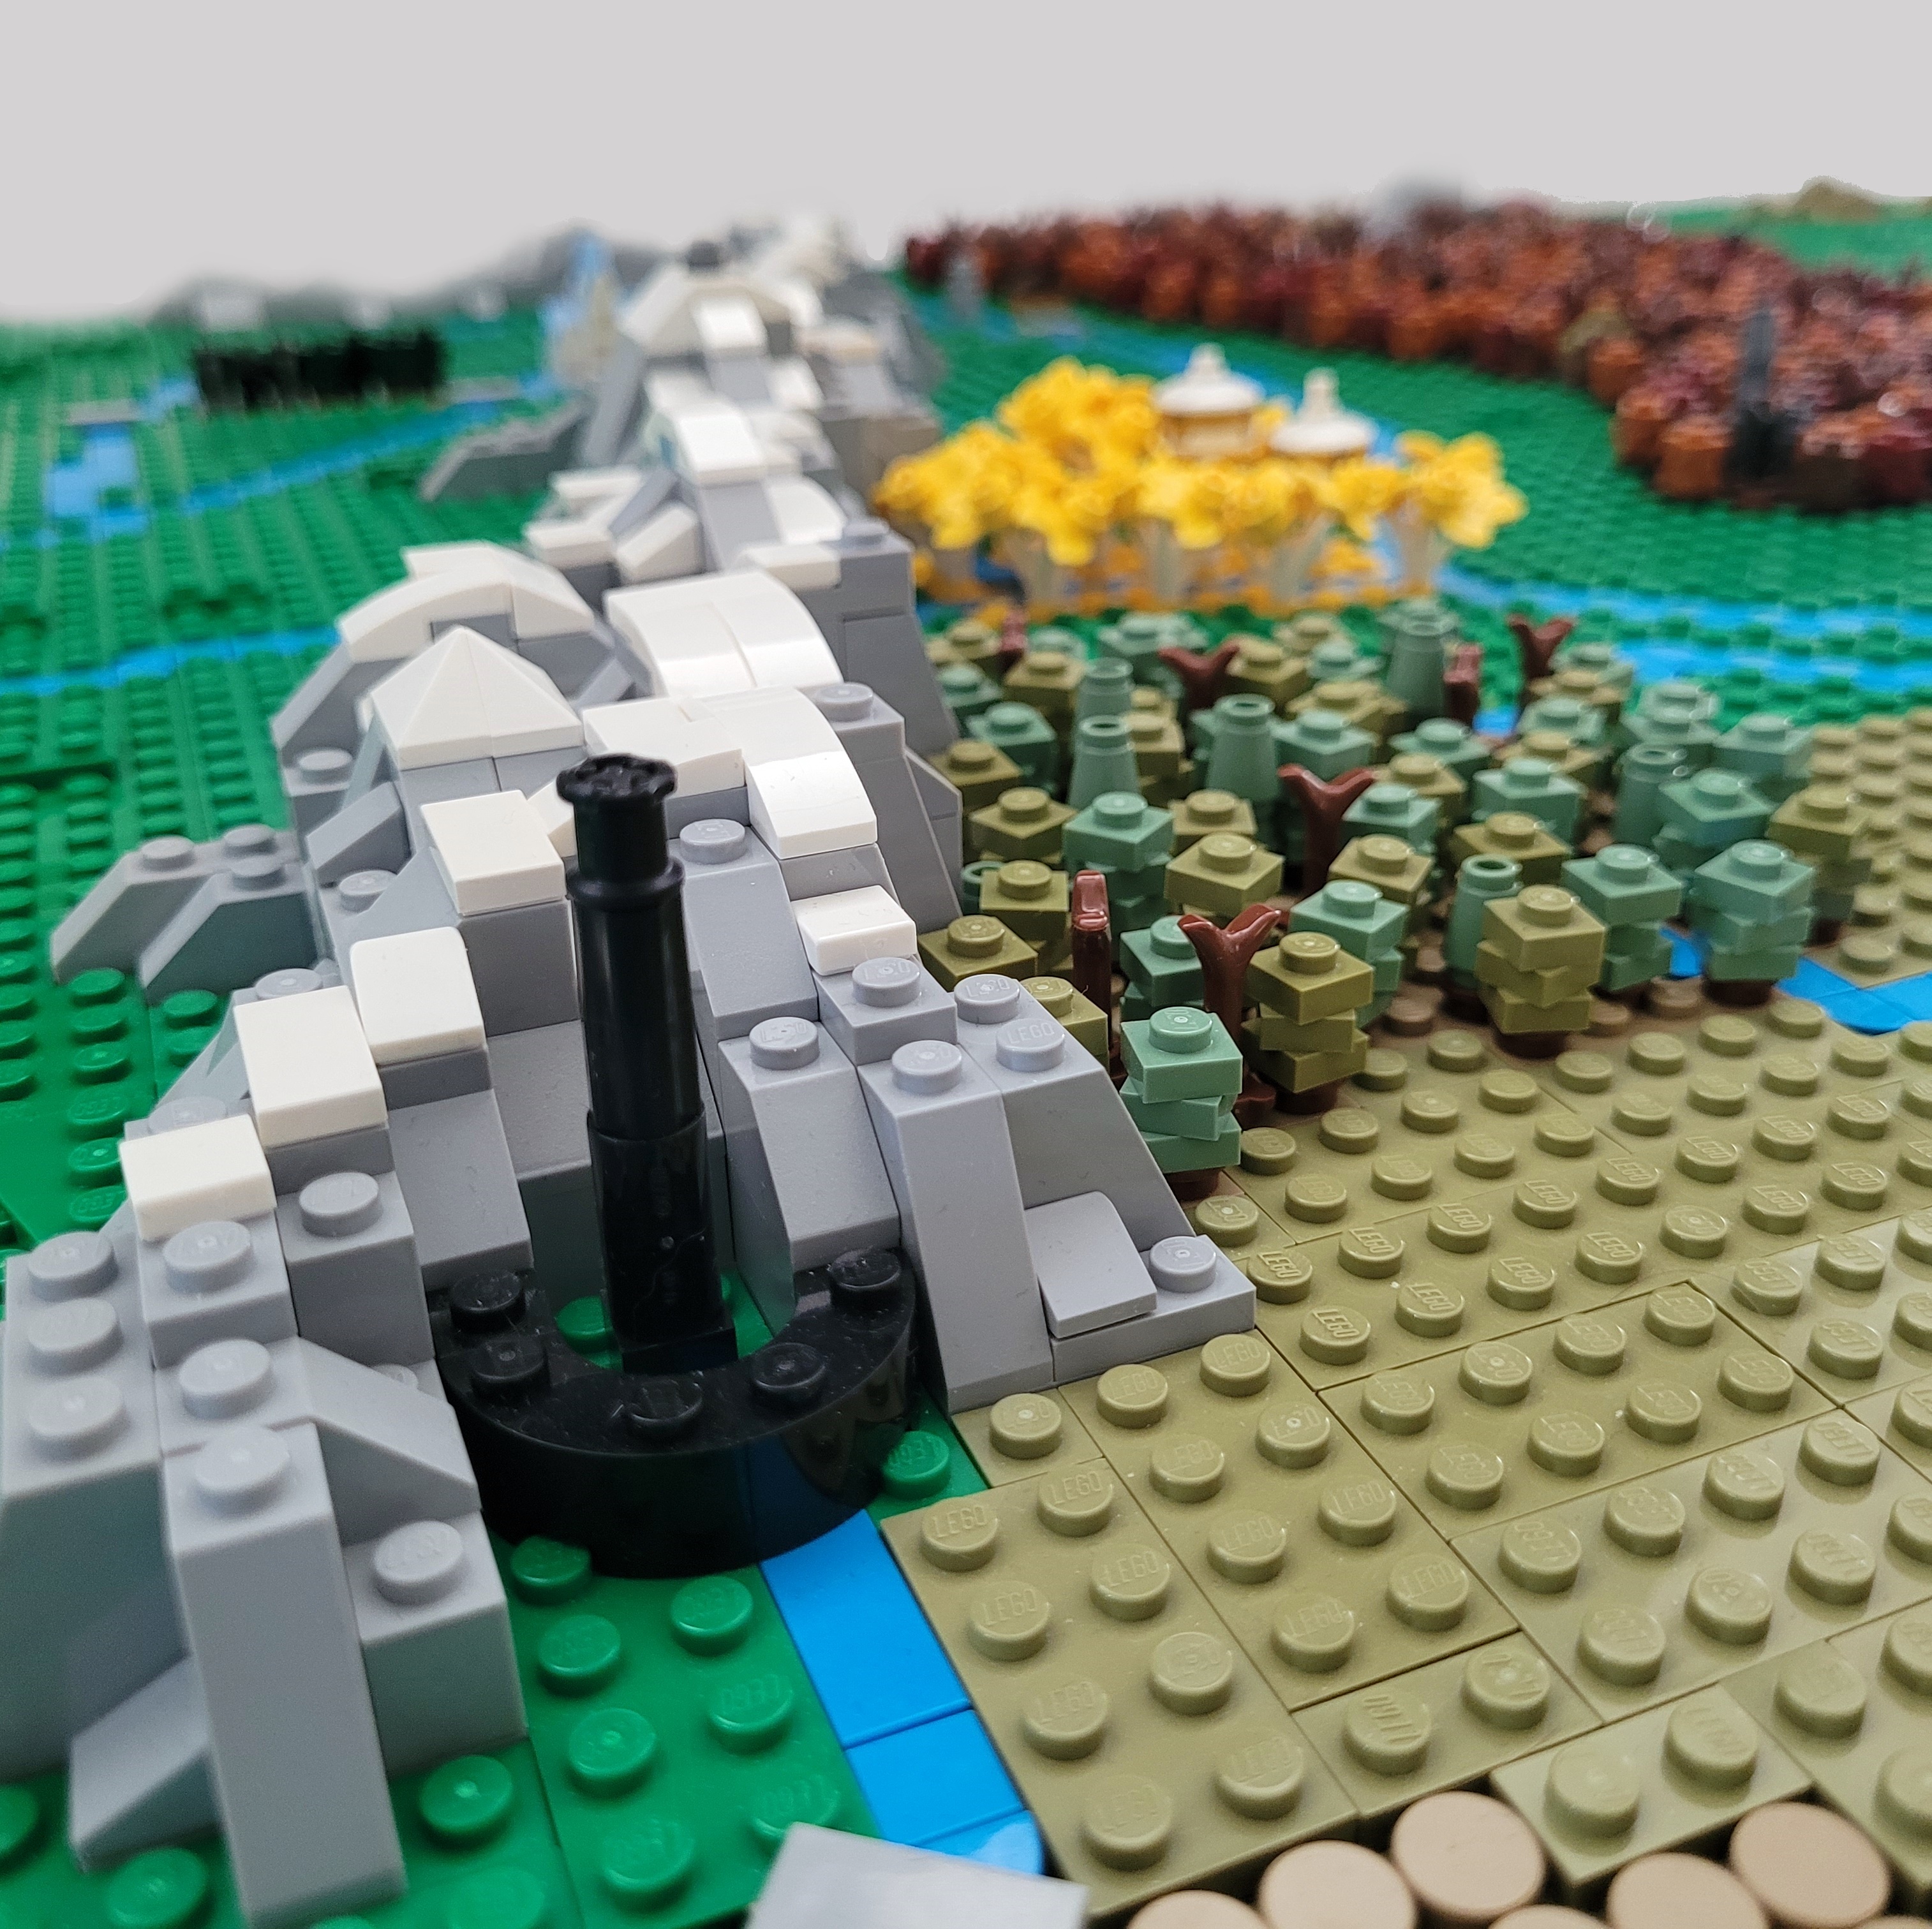
- Light bluish gray (and white snow) for mountains and for Mordor.
- Dark bluish gray for the more sinister mountains around Mordor.
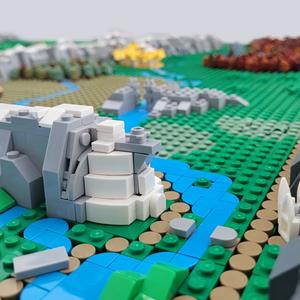
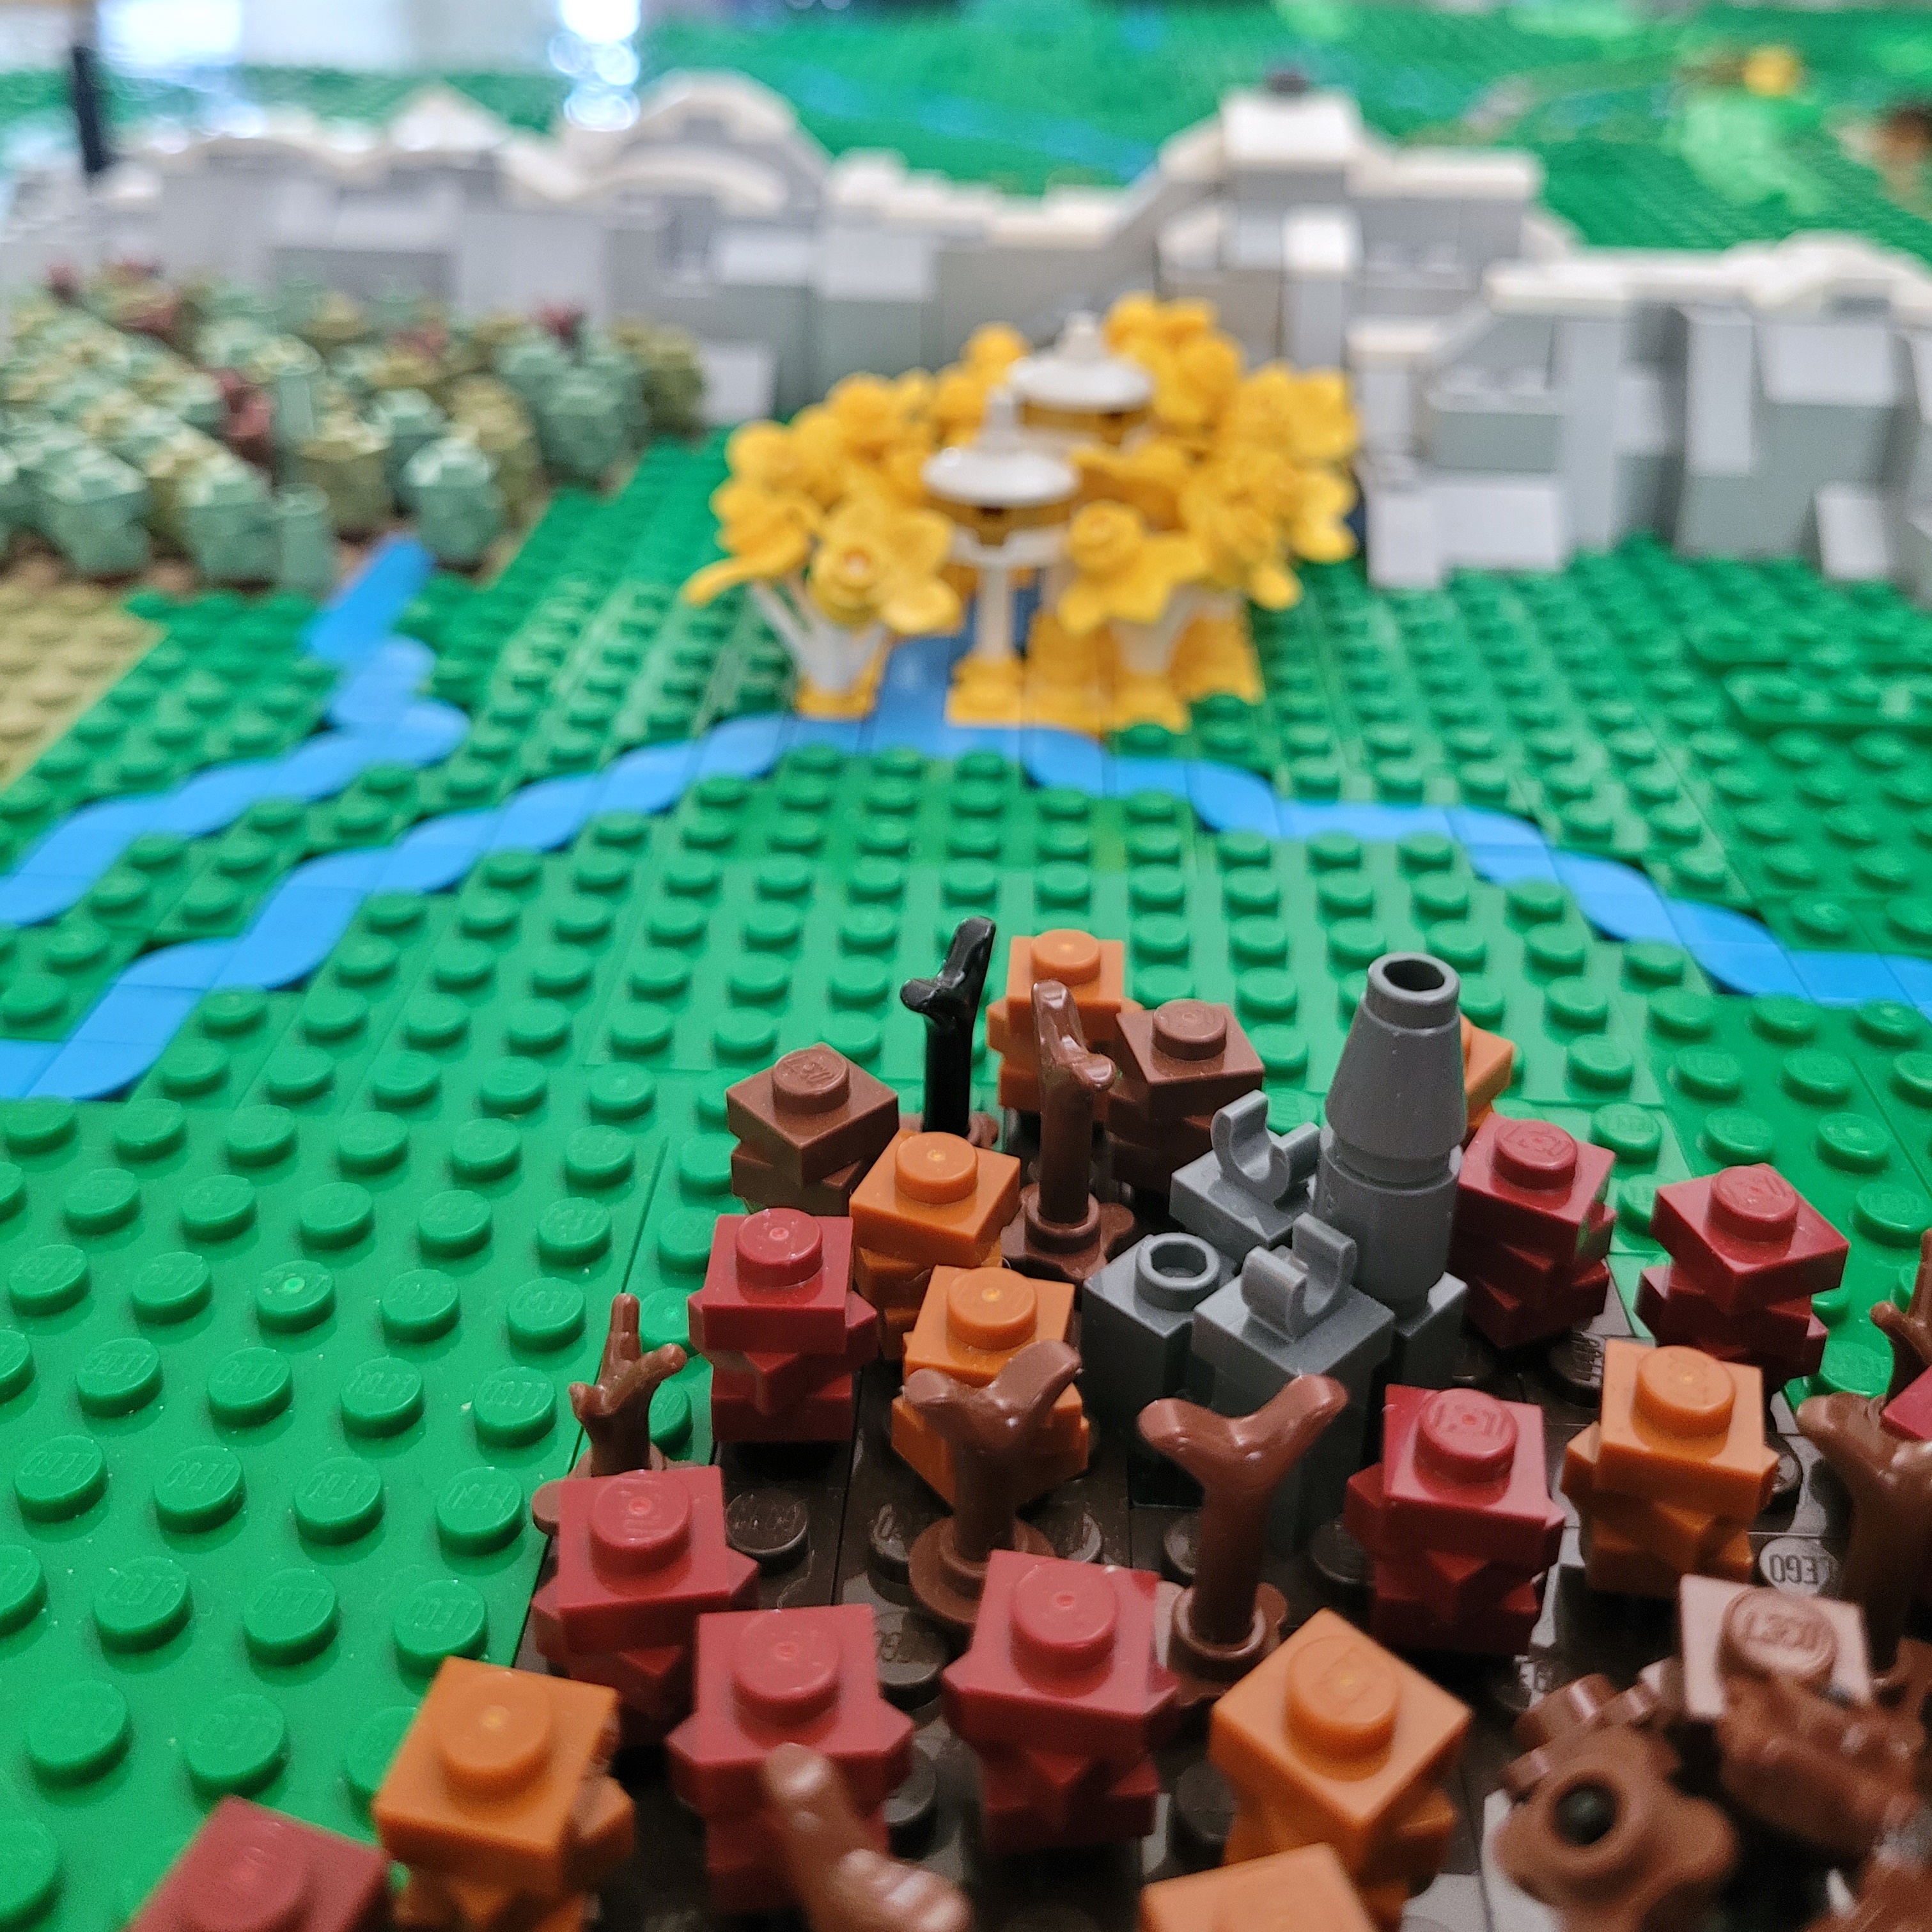
- Green for “Regular” ground.
- Bright green for hills.
- Sand green for marches.
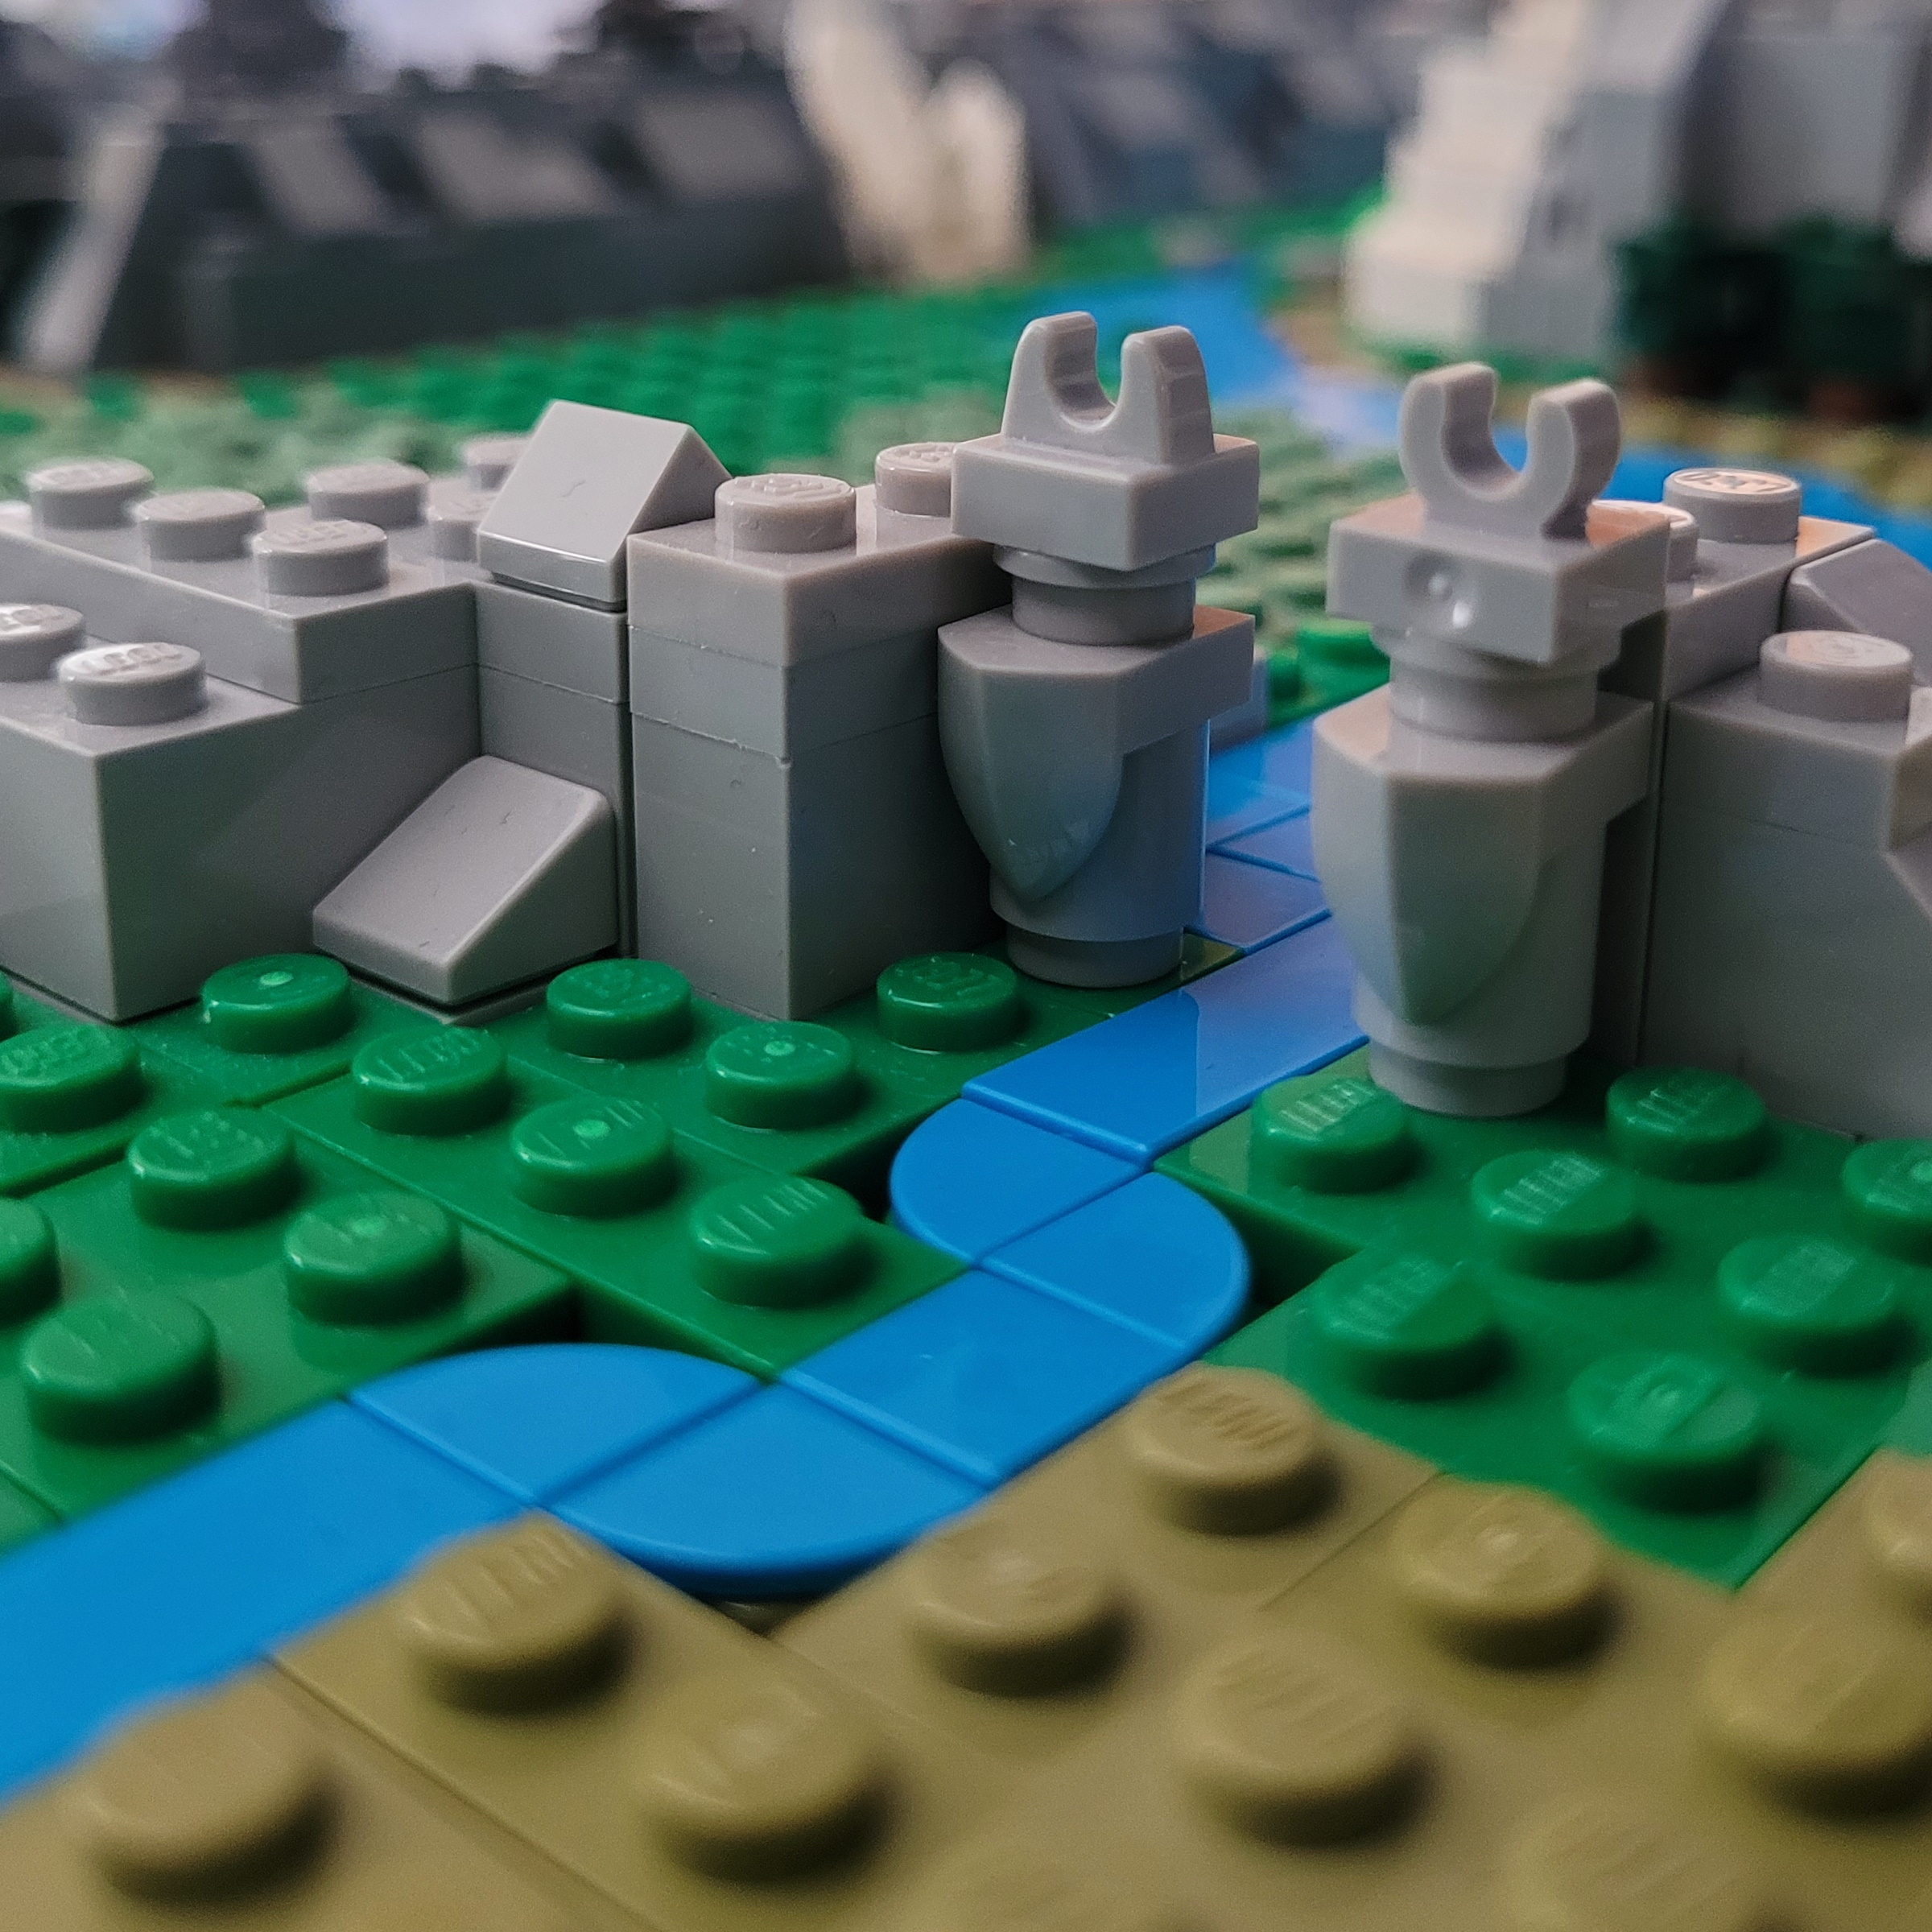
- Dark azure for rivers and coast lines.
- Dark blue for the ocean
- Olive green for Rohan plains
I also generally don’t want to “re-use” colors, having one color represent more than one thing, but decided to use light bluish gray both for mountains and the destroyed lands of Mordor.
I first wanted to use regular blue for rivers and coast lines, but much used “Tile, Round 1 x 1 Quarter” did not exist in that color when I started with the project.
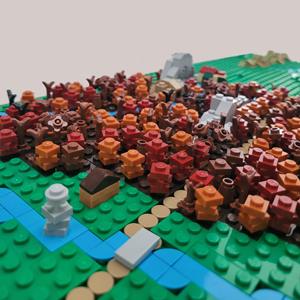
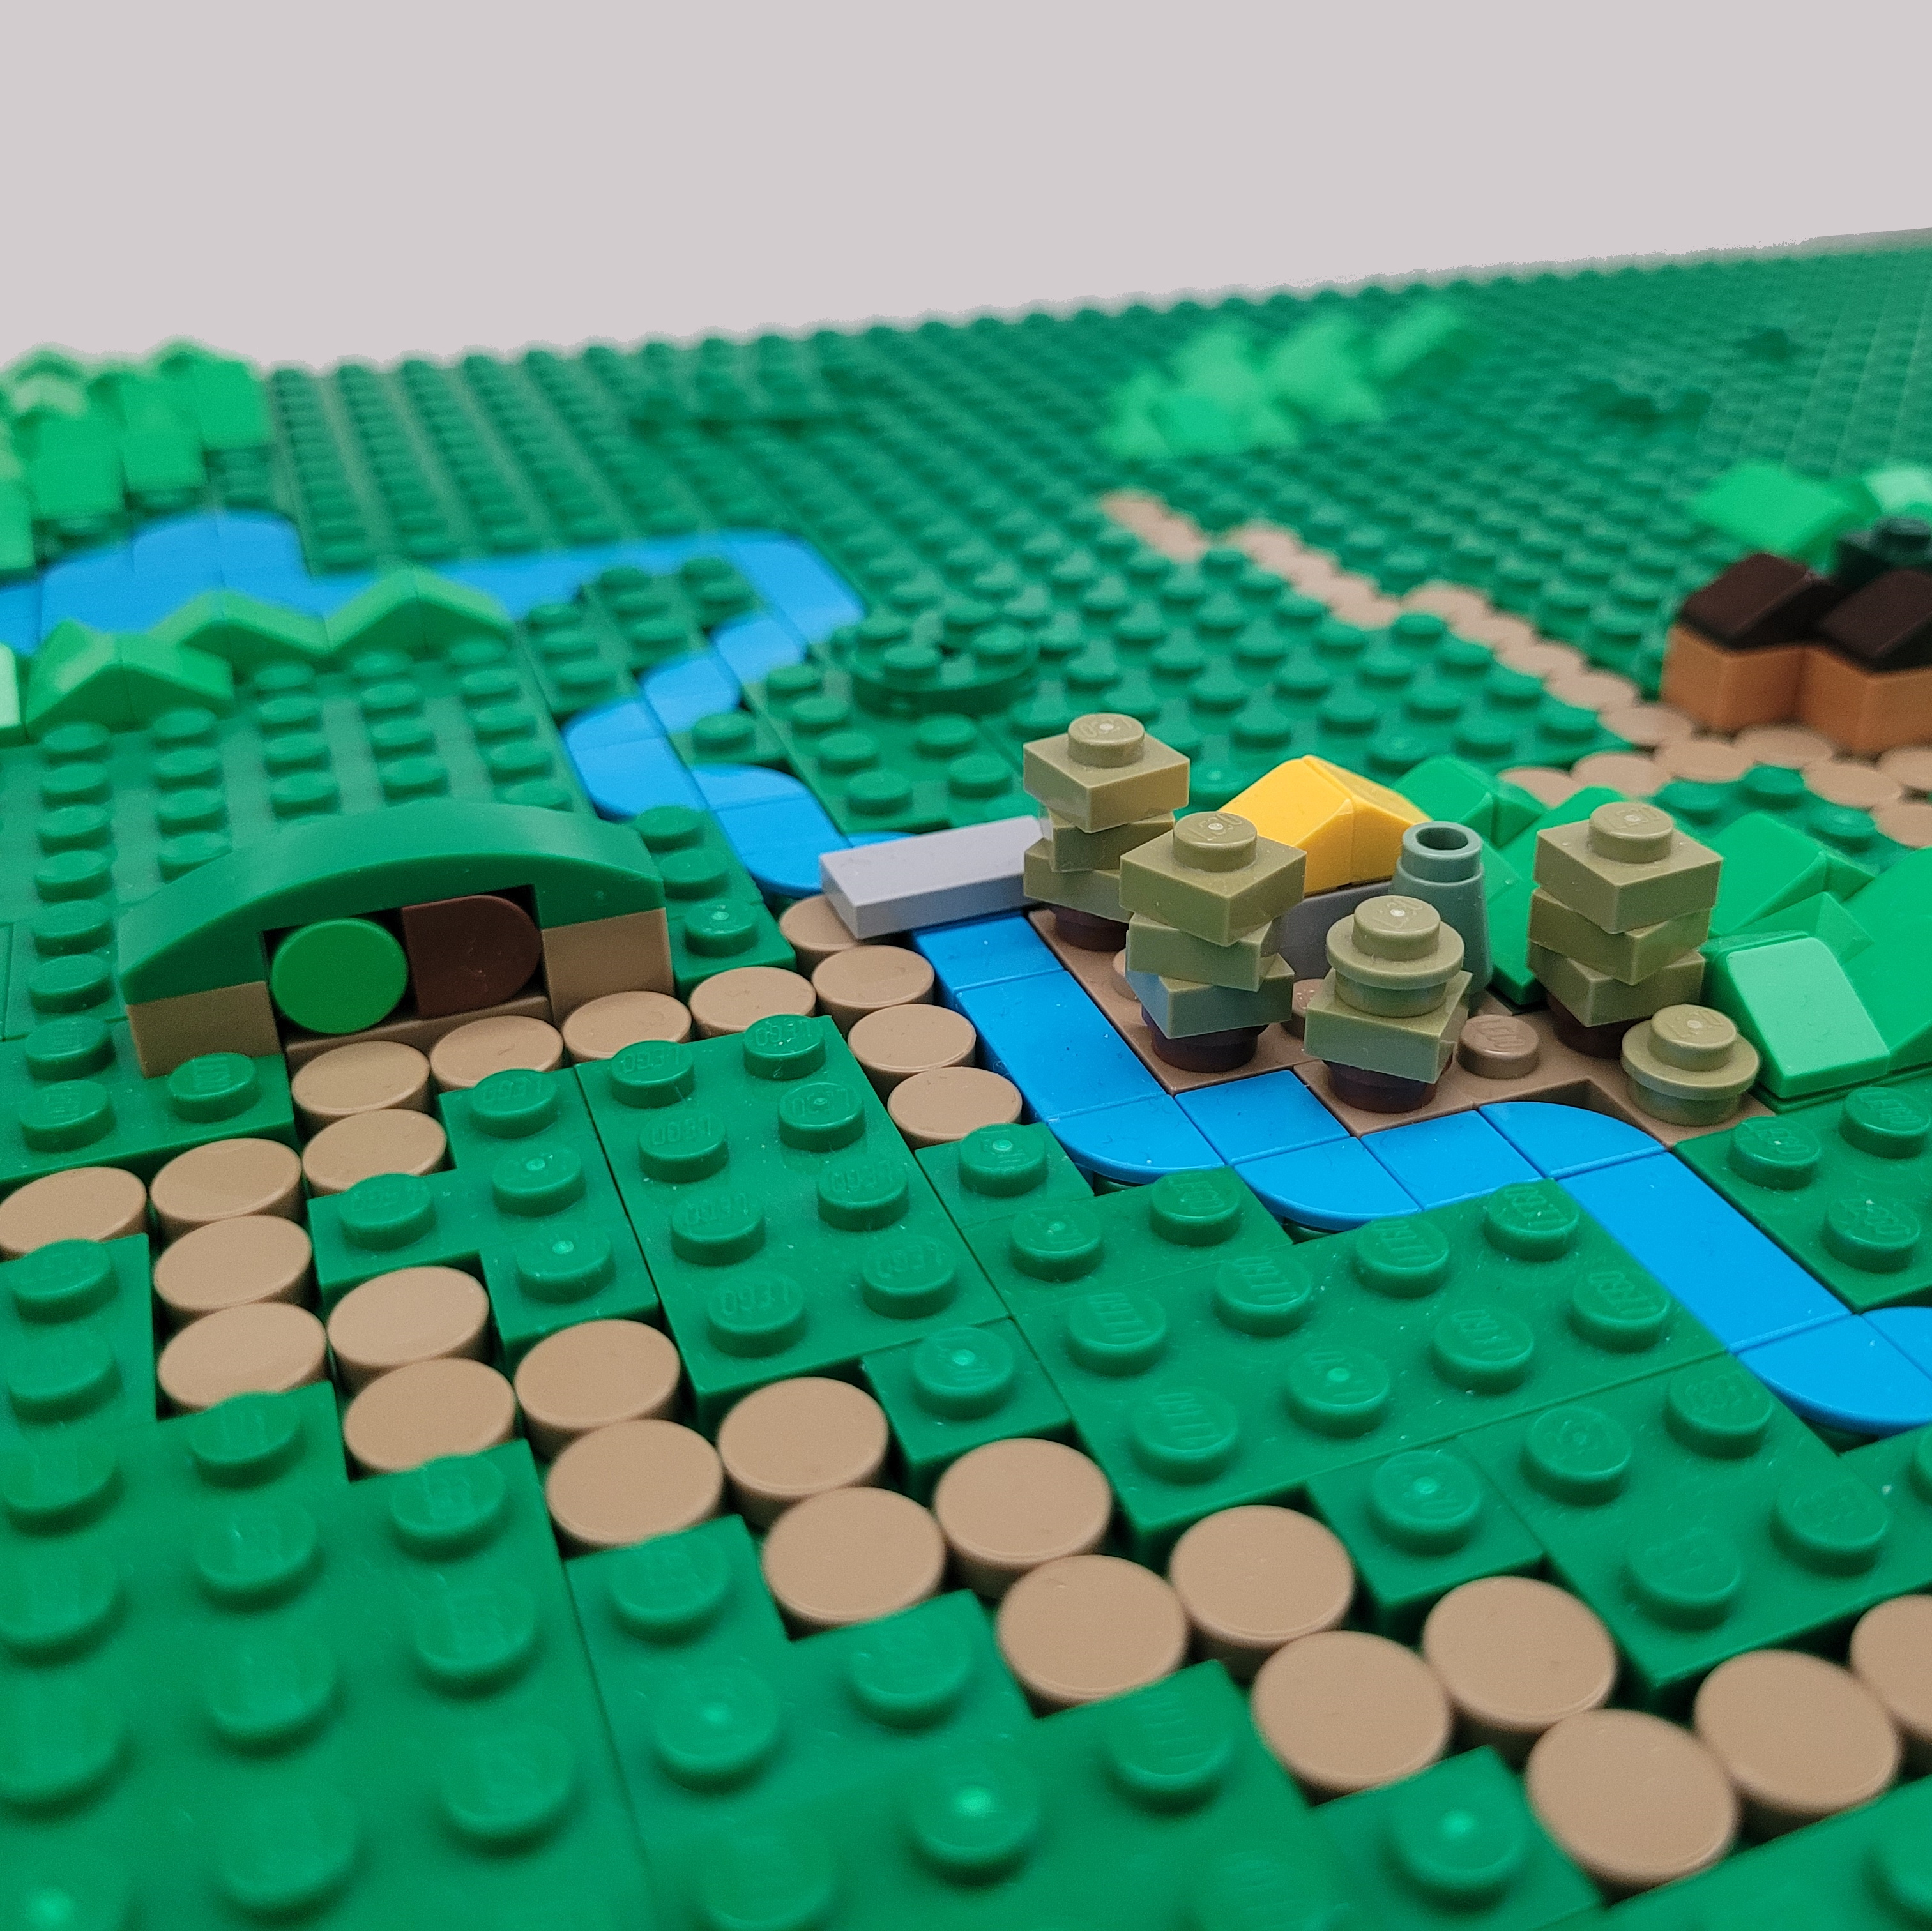
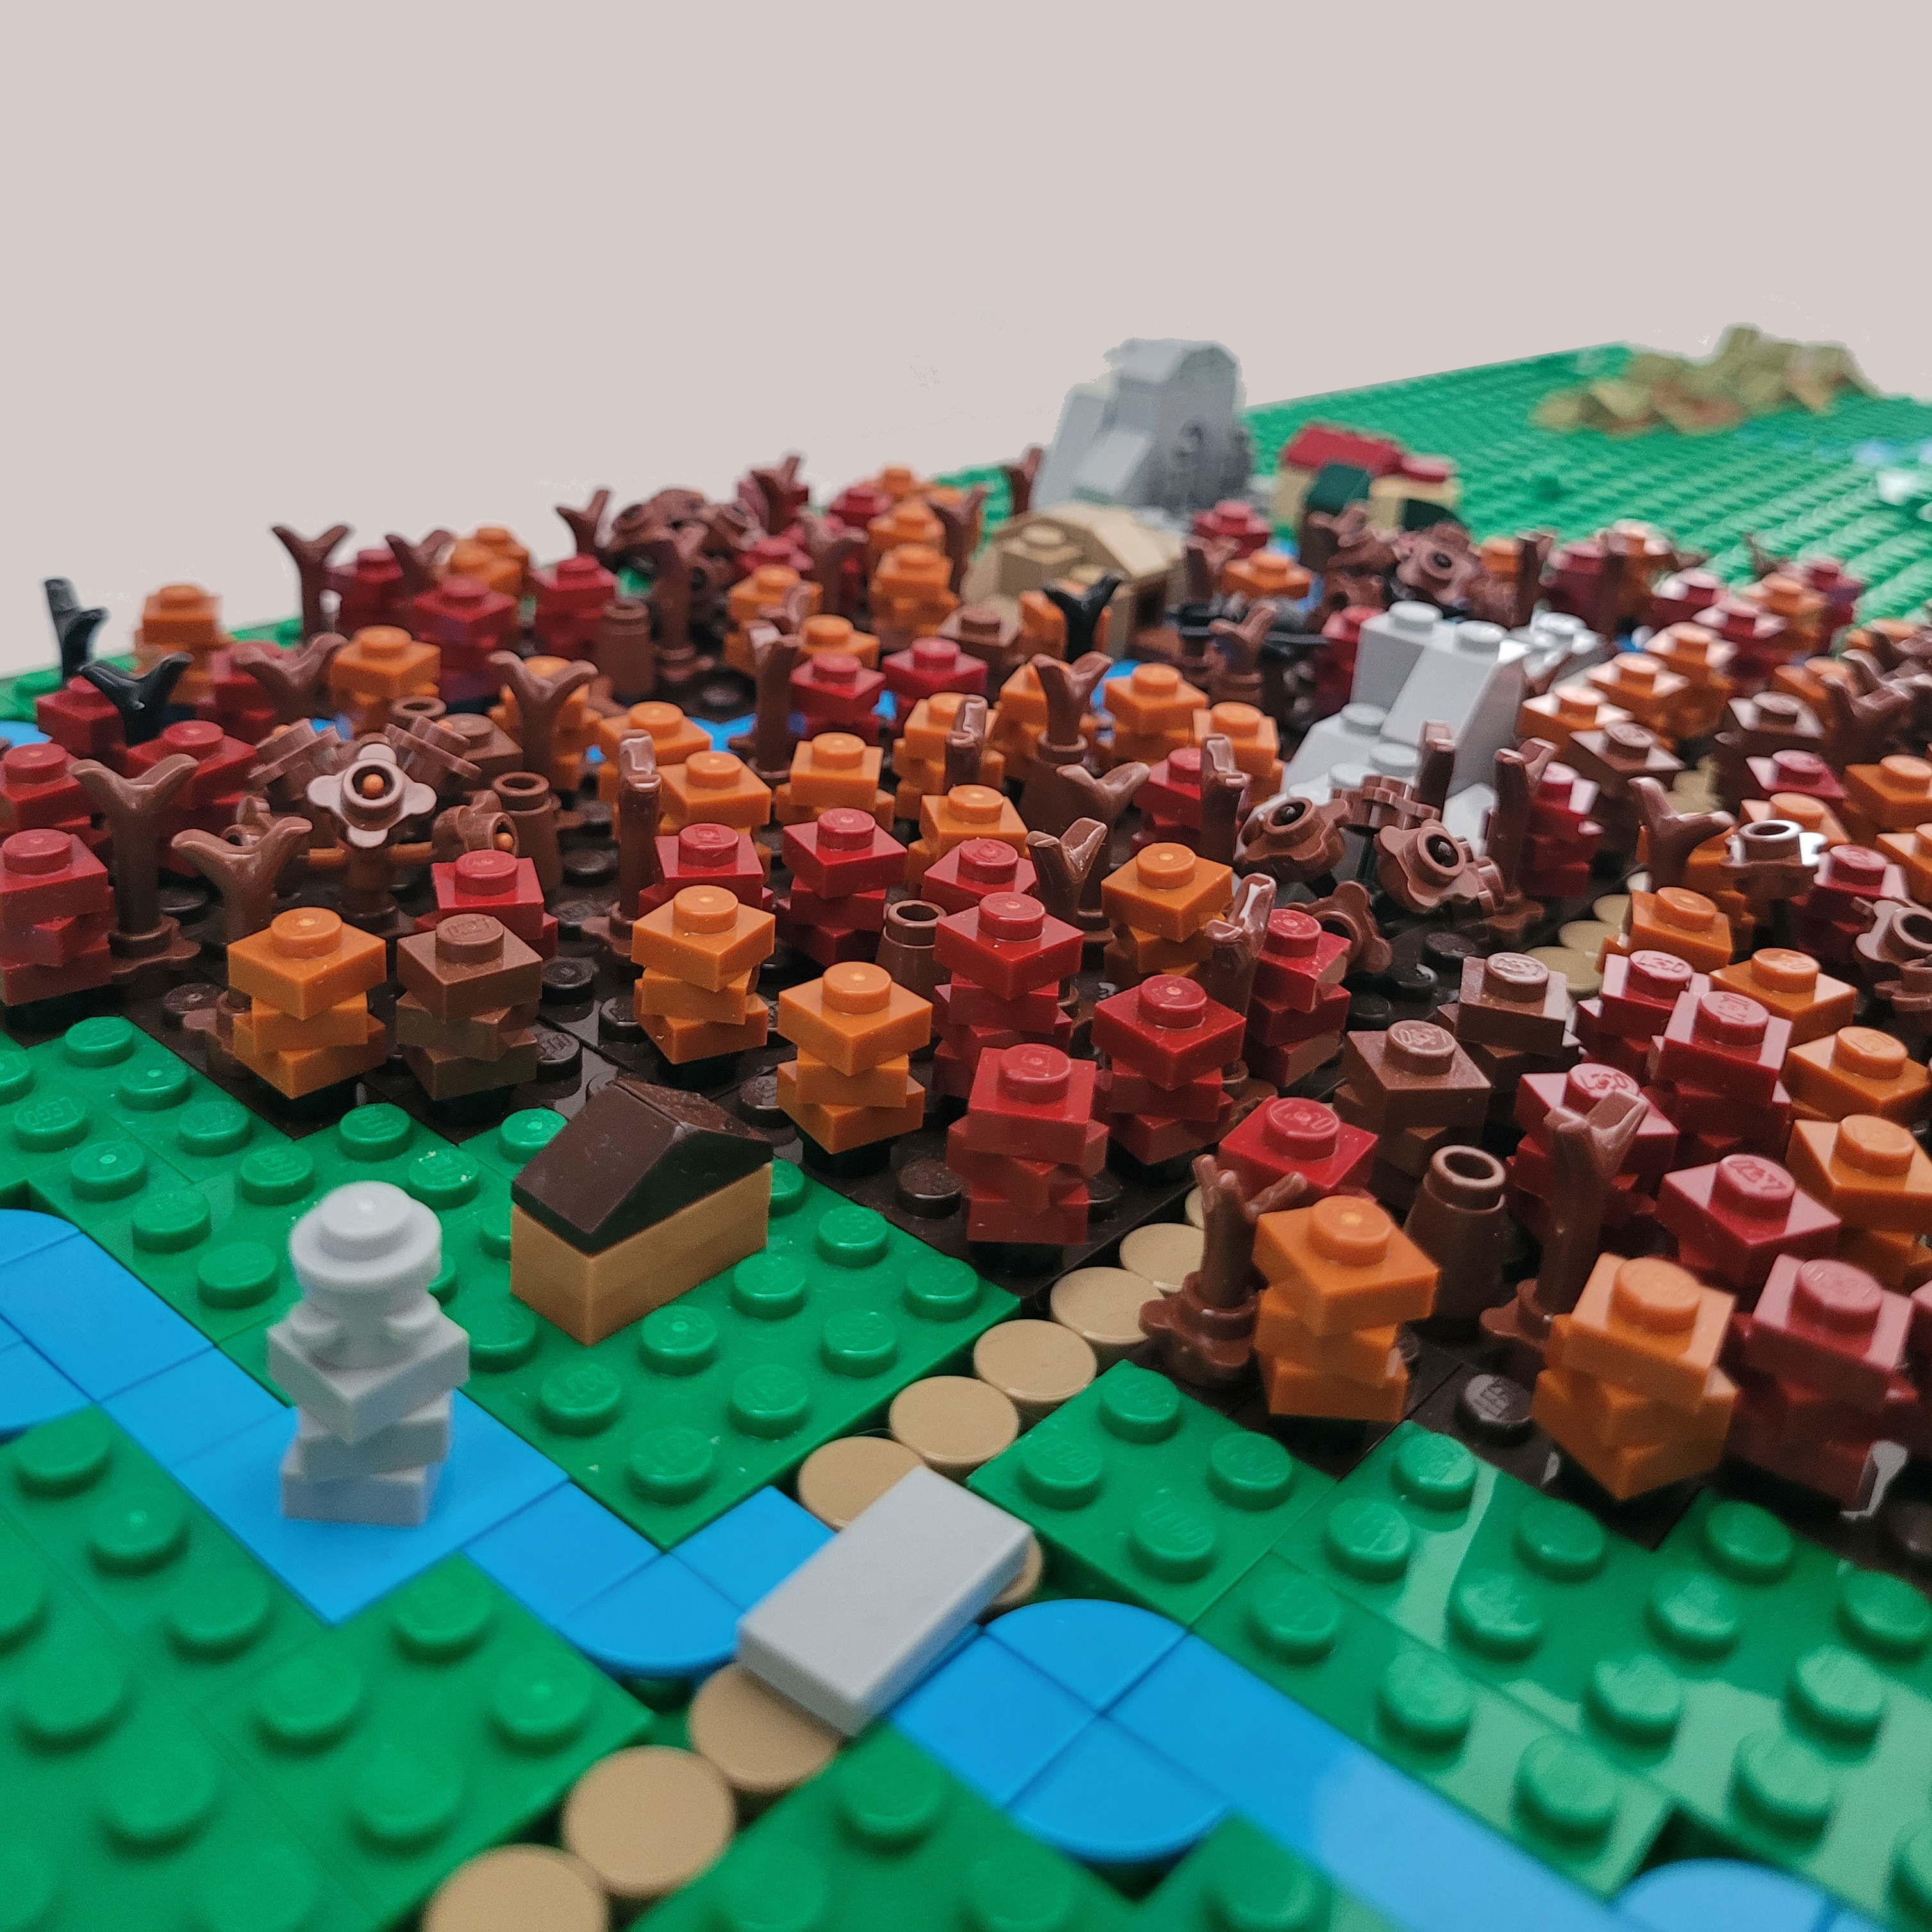
The forests are the parts that are not consistent in color. I decided to make them in different colors to distinguish them.
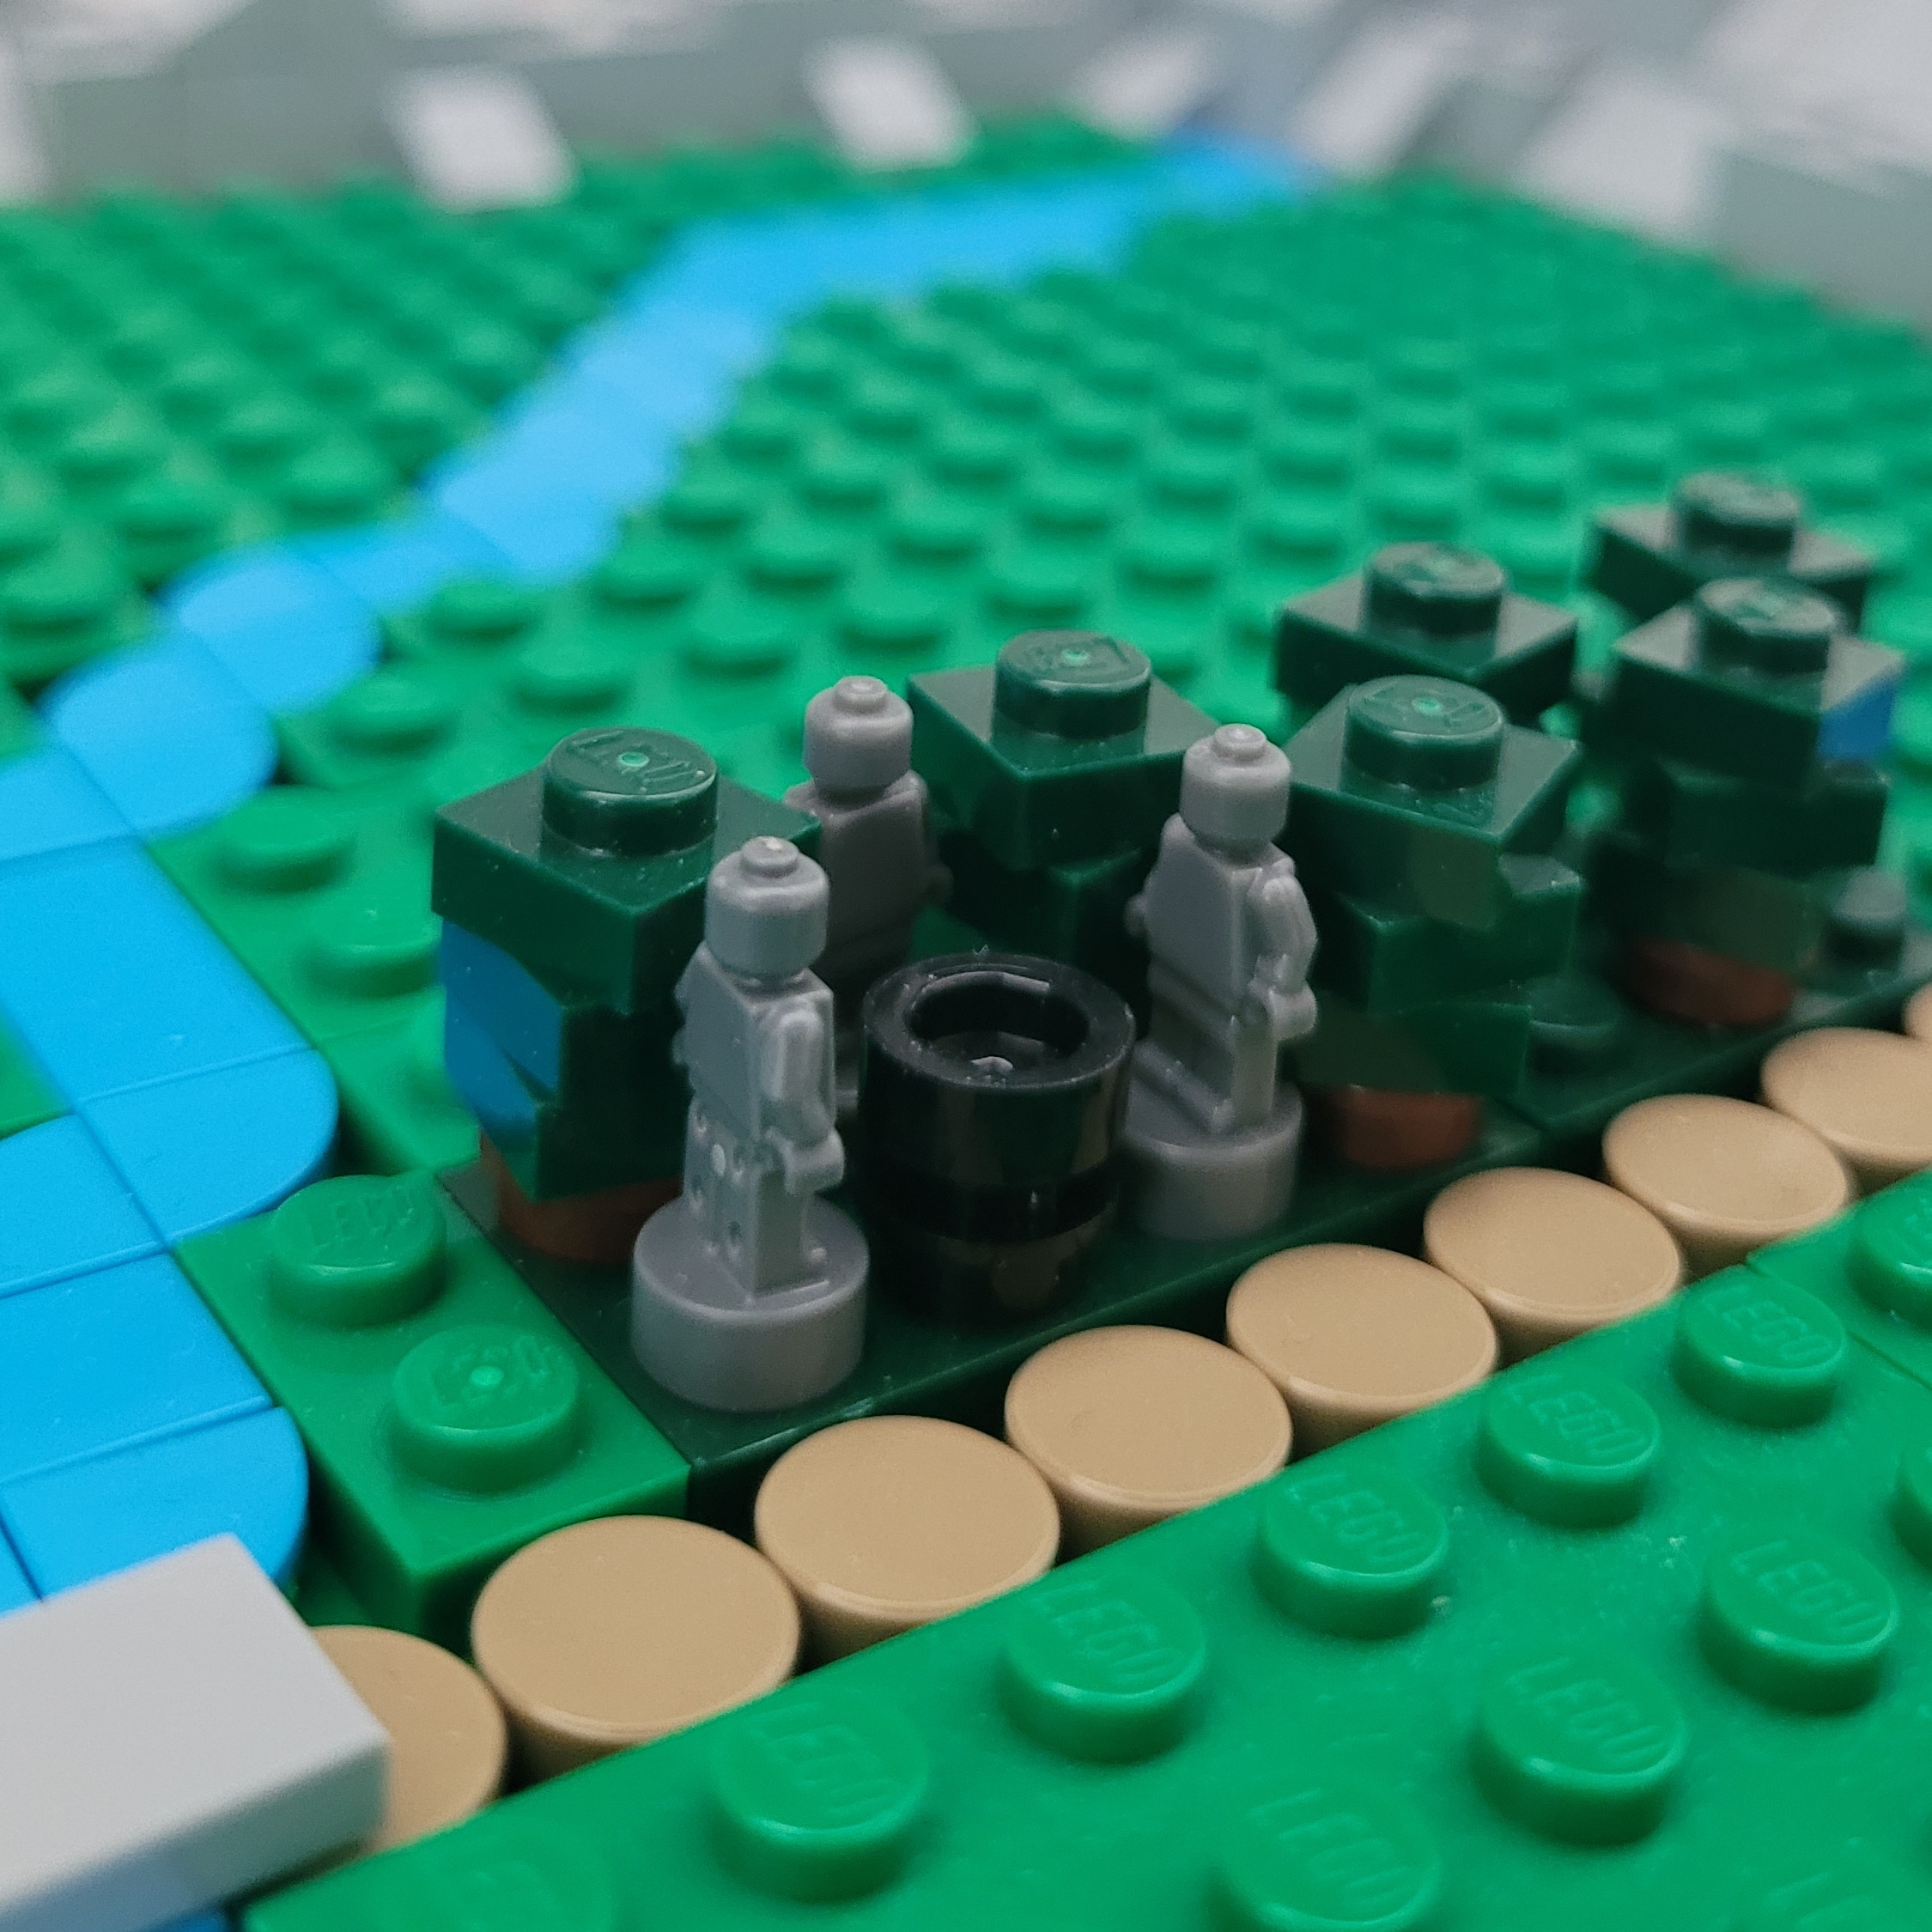
- Normal forests have dark green as color for both ground and trees.
- Lothlórien has yellow trees and ground to be more in line with Tolkien’s description of that forest.
- Mirkwood is made with darker “autumn colors” to signify its decay to evil. The ground is dark brown and leaves are reddish brown, dark red and dark orange.
- Fangorn and other old forests are made with dark tan ground and trees are olive and sand green (with some reddish brown tree trunks in Fangorn).
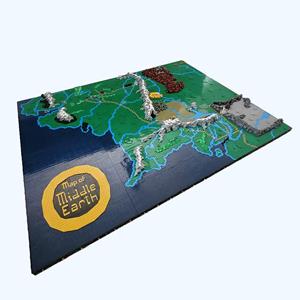
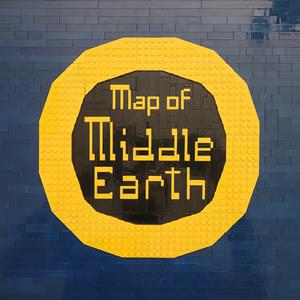
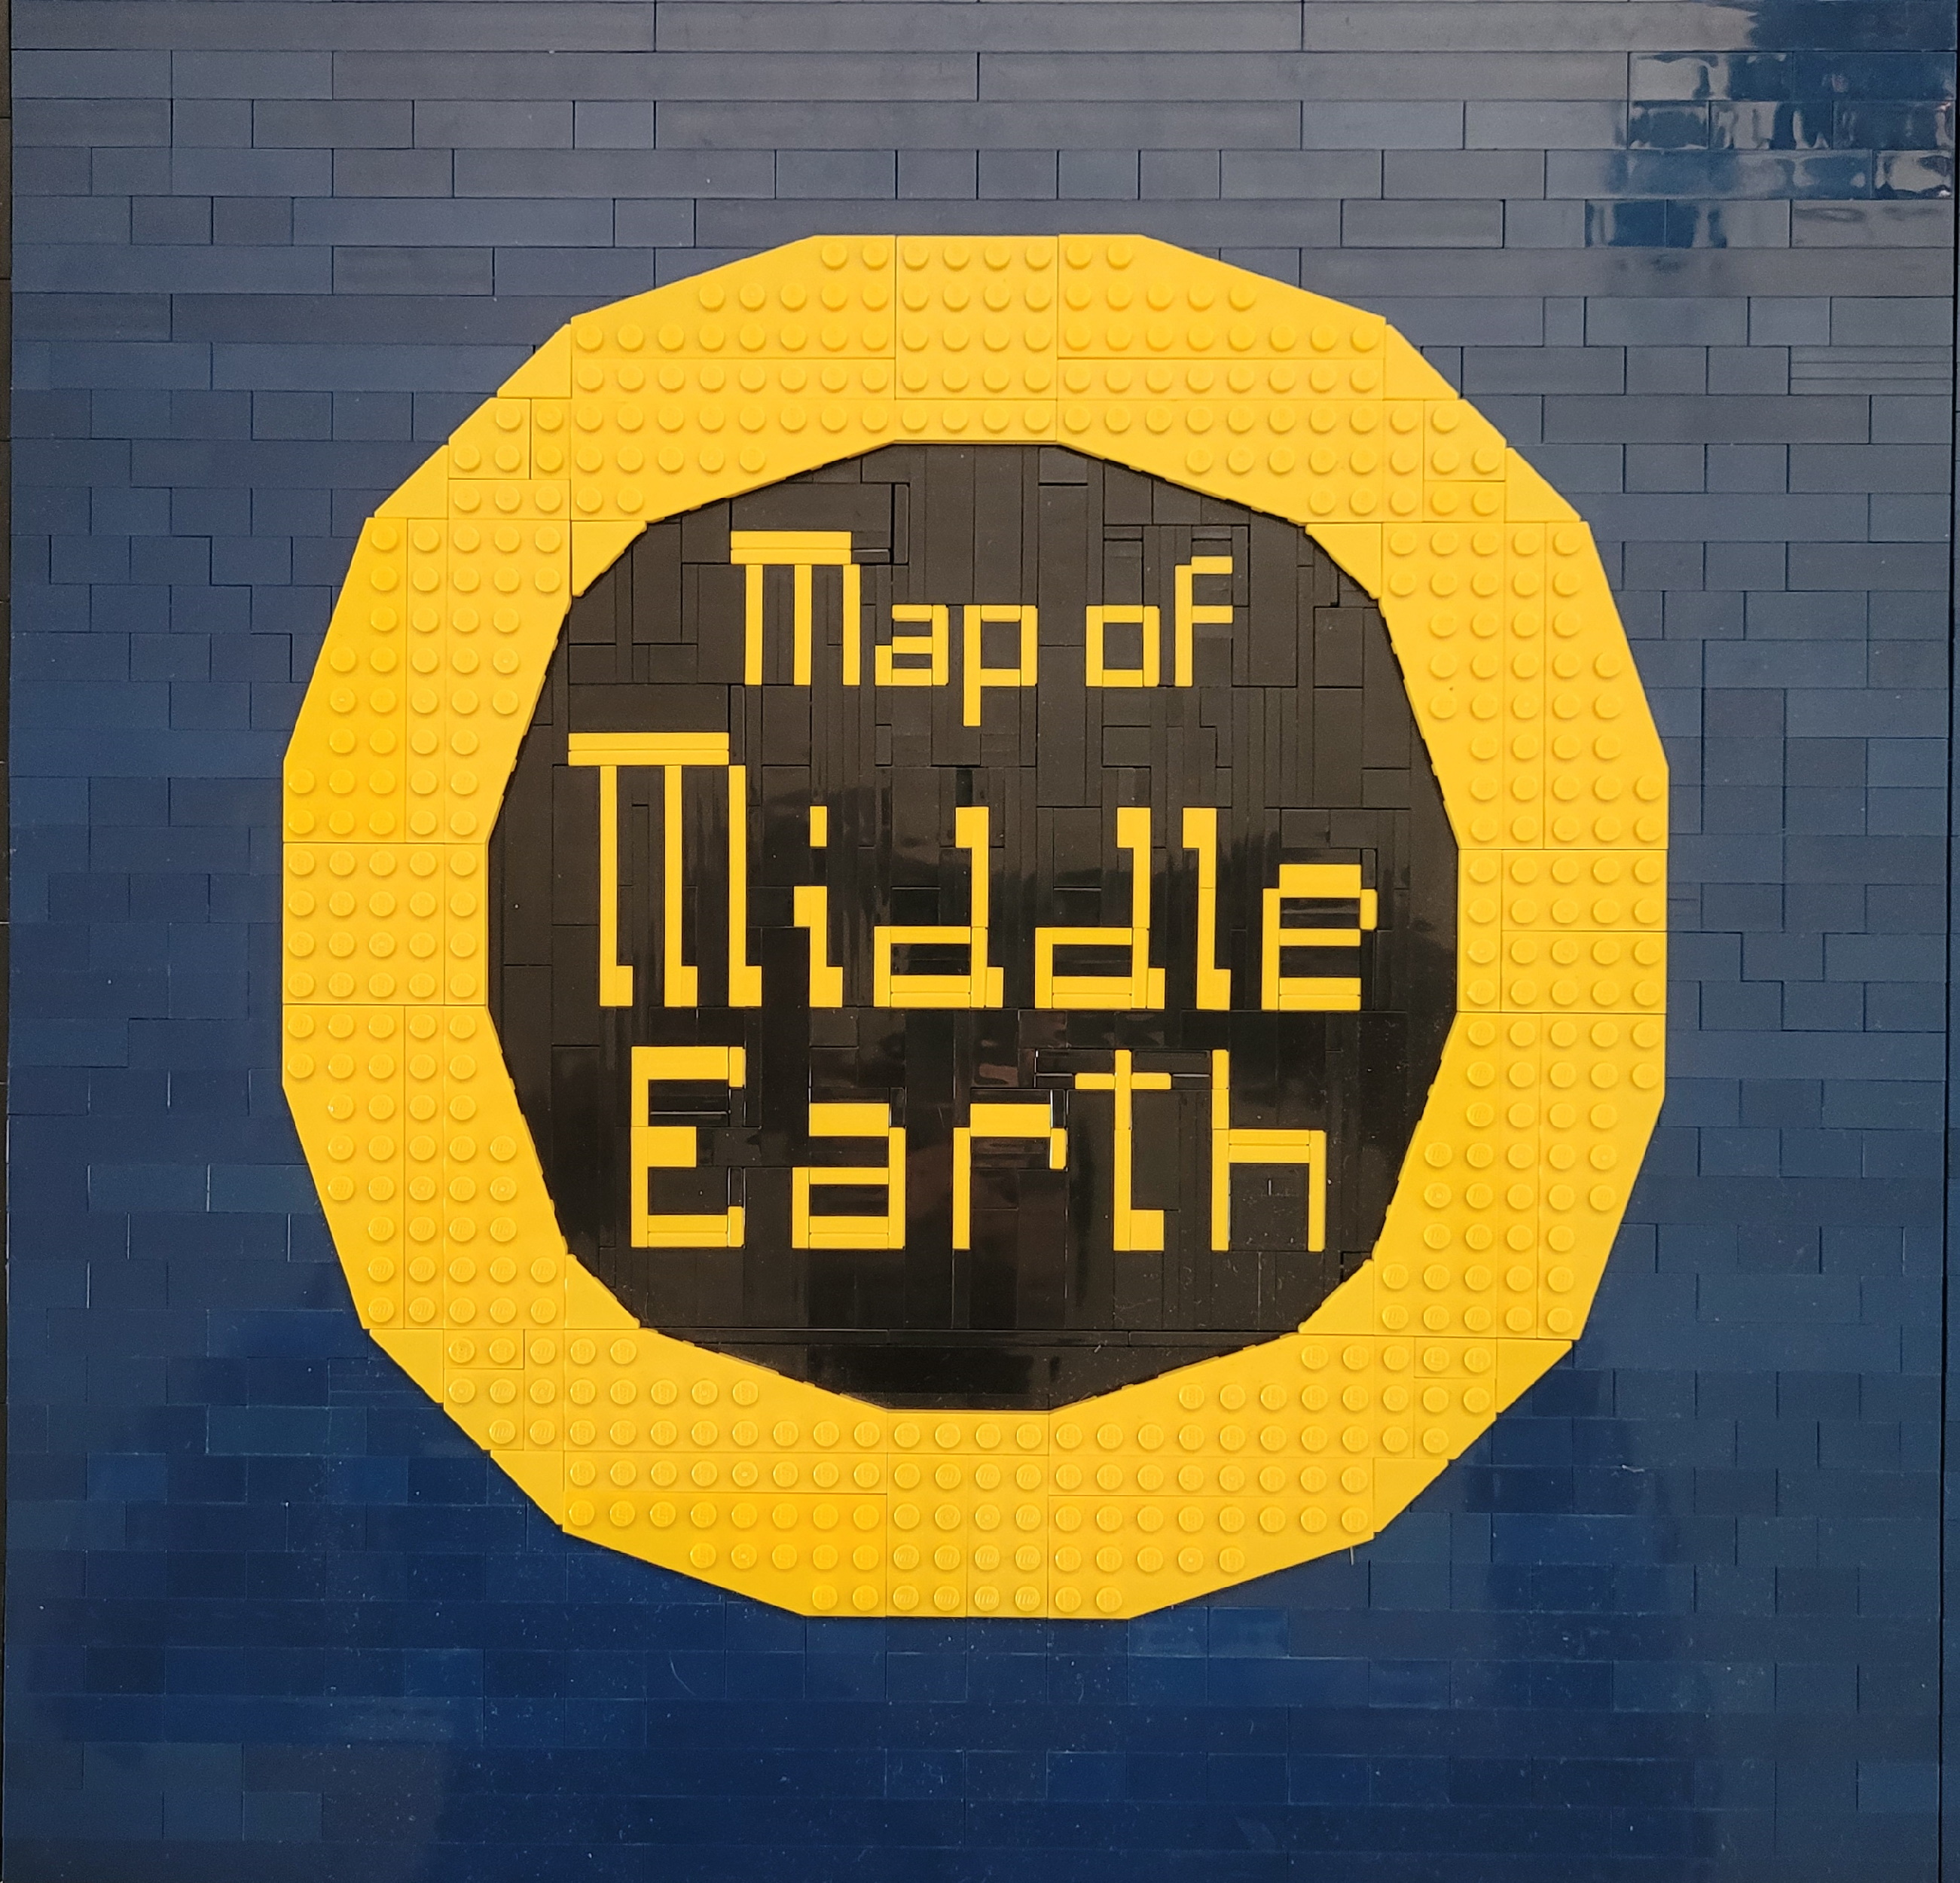
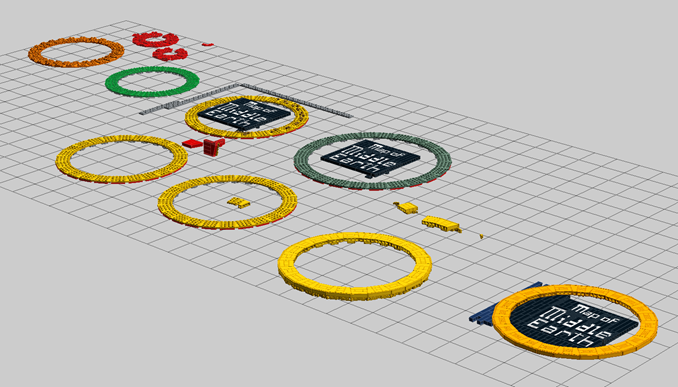
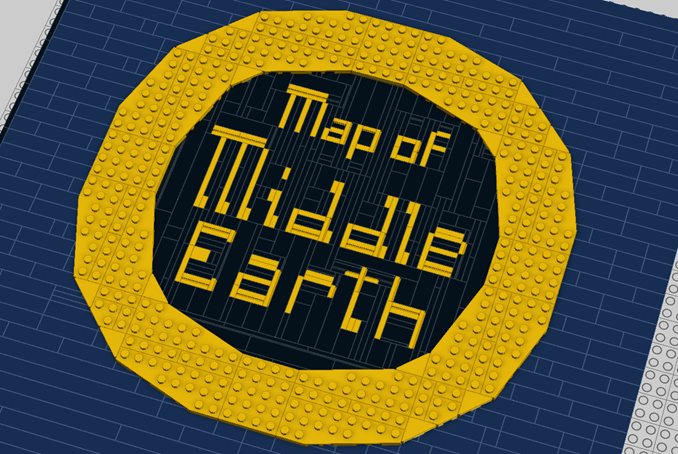
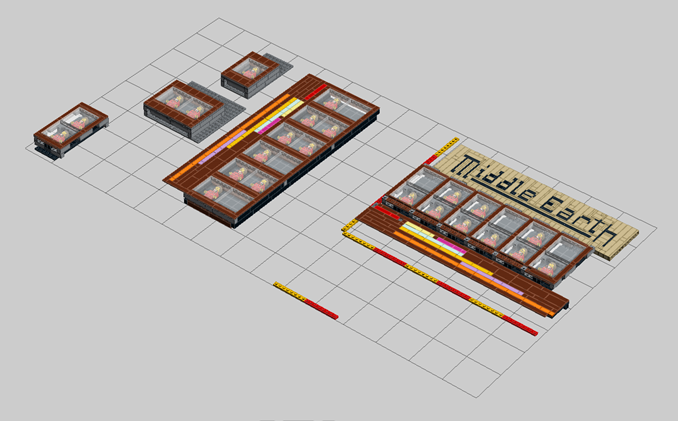
The ring and text
When I started designing the map I knew that I didn’t want to have one big empty ocean in the south west corner. Besides being visually boring, I would need to buy a bunch of dark blue pisces to build it too. It took a while to figure out exactly what I wanted to have there. It ended up being the last thing I designed and built for the map.
Below are some of the discarded ideas I had.
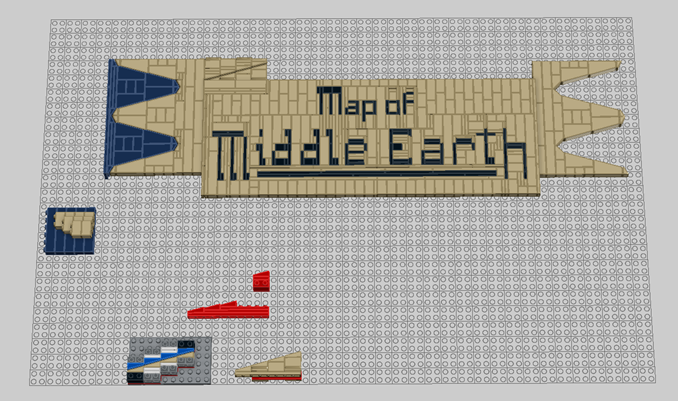
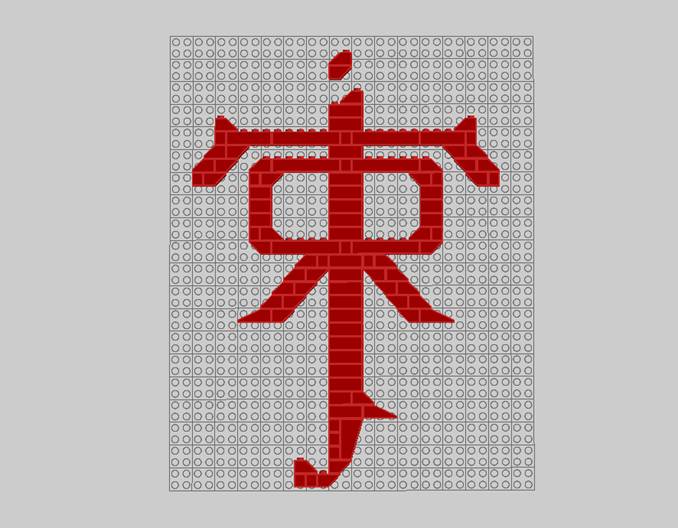
I’m very happy with the typeface I managed to design for the text. I tried to make it look similar to something used for the Lord of the Rings franchise.
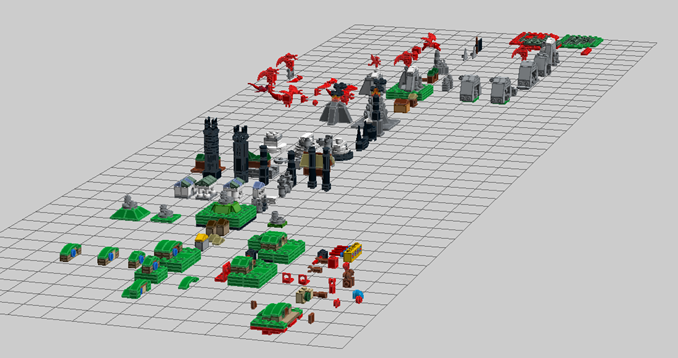
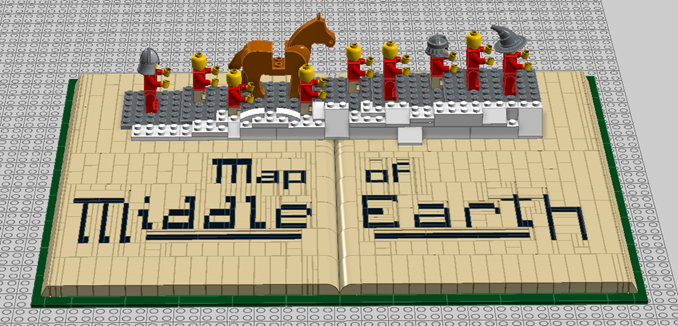
Dropped ideas
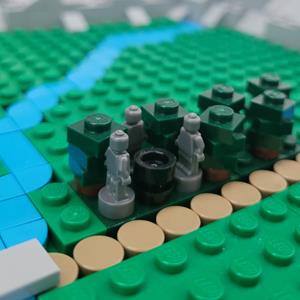
An early idea I had for the map was to place out Minifigs on the locations that they are associated with. I dropped it as it would be expensive to buy the minifigs I were missing and the reasons for a minifigs being where it was would end up being very inconsistent
A second idea I dropped was to mark out the paths Bilbo and the fellowship members traveled. I decided it would not look good. Especially if I would try to mark out all the paths Gandalf took in the Hobbit and Lord of the Rings trilogy.
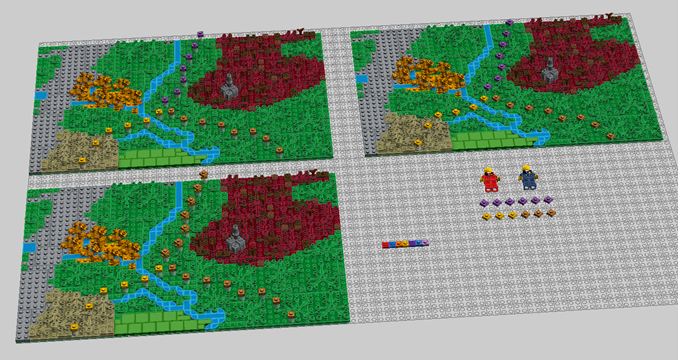
With the path idea, I was thinking using a minifig display to help show which paths belonged to which characters.
How I feel about the build
My Lord-of-the-Ring-nerd-side really likes it and thinks the result is cool. But the LEGO-nerd side of me wishes that the build would contain more impressive techniques or imaginative part usage. I wish I would have been able to satisfy both sides of me, but the LEGO-nerd had to step aside or otherwise this project would never be completed.
It was definitely a project I needed to do. Building a fantasy map / miniature landscape has been on my mind for years and it was nice to finally get to do it.
Reception
Within the LEGO club I belong to (Swebrick) the map got nominated for best Pop-culture build at our 2023 event in Örebro (but lost to a many times bigger Star Wars build.) and was selected for MOC of the Month in May on our forums. Both distinctions were nice to receive.
I’m planning on exhibiting the map at Skærbæk Fan Weekend this year and looking forward to seeing what the nerds there think of the map.