Exploring the Dune files – The Image parts
This is my third post about the image files of the computer game Dune. All the previous posts can be found on this new summery page.
In this part I will finally talk about the actual images in the image files.
Image specifications
An image part in the image files starts with four bytes that tells us if the image is compressed, it’s width, it’s height and the palette offset (more about that later).
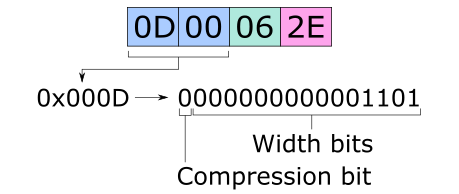
It would be easy to think that these four things would get one byte each, but with maximum possible width on screen being 320, width needs more than one byte to be defined. But instead of giving width two bytes for itself, the developers decided to combine the compression and width value into one word (a nice way to save a little space). So the highest bit in the word tells if the image is compressed or not, and the remaining bits are used as bits for the width value. The other two values, height and palette offset, do have one byte each though.
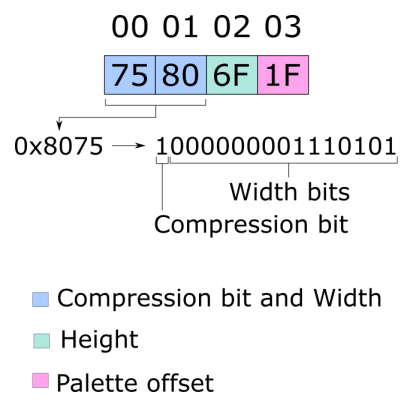
(Note: If the first two bytes are both zero, you are not looking at an image part.)
The pixels
The remaining bytes of the part should all be read and processed as data for pixels. The data is ordered with top-left pixel at the start and bottom-right pixel at the end. As mentioned above, this data can either be uncompressed or compressed, which means there are two ways to handle the remaining bytes.
With uncompressed data, all remaining bytes represent two pixels each. The four lowest bits are for the first pixel and the four highest bits are for the following pixel. If any of the two 4-bit values are zero, that pixel should be seen as transparent. If the value is greater than zero, the palette offset value (mentioned above) should be added to it. This will give the index value of the color in the VGA palette to use. (If the resulting value is greater than 255, subtract 255 from it).
![]()
This way of storing pixels means only a span of 15 colors in the VGA palette (of 256 colors) can be used per image. So when the game needs to draw something with a wide variety of colors, several images are combined.
If the data is compressed, it done in as style called “Run-lenght encoding”. Simply put, the data is dived into sections where one byte should be repeatedly processed several times and sections where a group of bytes should be processed as is (same way as uncompressed data).
Each section starts with a byte that should be read as a signed integer. If it is negative, the following byte should be processed multiple times. The number of times it should be processed is calculated by taking the negative number, turn it positive and add 1 to it ((N*-1)+1). Meaning that a value of -4 tells that the next byte should be processed 5 times. (As with uncompressed data, the repeating byte represent 2 pixels.)
If the section starts with a positive signed integer, a bunch of the following bytes should be processed as uncompressed data. The number of bytes that should be processed is the starting byte value + 1. Meaning that a value of 4 tells that the next 5 bytes should be processed.
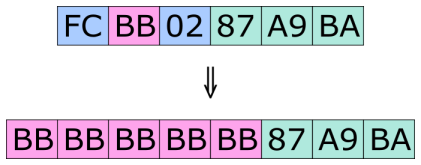
The above picture show the conversion of compressed data to uncompressed data. The first byte is signed negative 4, which means that the following byte should be repeated 5 times. The third byte is signed positive 2, so the three following bytes should be copied as is.
Read all the bytes
The width and height values read in the header should not be used when determine how many bytes to read. Read all the bytes until the end of the main image part has been reached. That is, reaching the start of the next part or reaching the end of the file. I will explain why below.
Drawing the pixels on screen
Once width, height, palette offset values and a bunch of pixels (or palette index values more precisely) as been read, we have everything we need to draw the image on the screen (assuming a palette has also been read and is available to be referenced).
But if the width of the image is not evenly divided by 4, we will have more pixels than needed. Again, this is because the game likes to processes data in words and not single bytes. So if width is set to 9, there will be data for 3 more pixels for each row that we can ignore if we want too. This means that when we want to draw the image on screen, in order to correctly calculate where a pixel should be, we need to round up the width to the nearest number divisible by 4.
Example
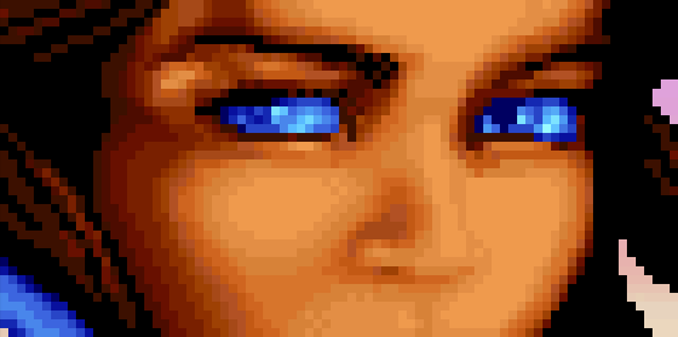
Below I will go though the 18th image found in chan.hsq file, a small image for one of her eyes.
First we have the 4 bytes for the header.
It tells us the image is not compressed (highest bit of first word is zero), width is 13, height is 6 and palette offset is 46.
And, following the header, we have 48 bytes for the pixels. We know the number of bytes for an image by checking where the next part starts in the offset array is. (I talked about the array in this post.)
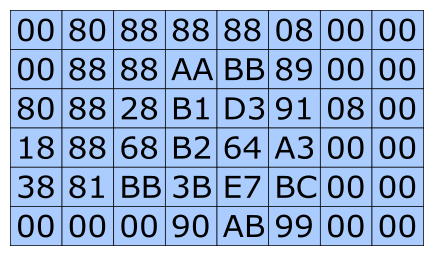
As stated, these byte are uncompressed data, so each byte represents two pixels. To calculate which color from the palette should be used for the pixels, the bytes needs to first be split into two 4-bit numbers. With the four lowest bites forming the first number and 4 highest the second.

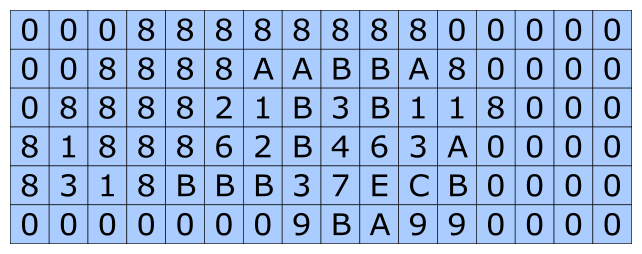
If we translated the binary numbers to hexadecimal we get the following numbers. I have placed the number in a 16 by 6 grid. 16 being the nearest number dividable by 4 after the image width of 13. Here we can see that the 3 extra pixels per row are set to zero, the number that marks which pixels should be treated as transparent.
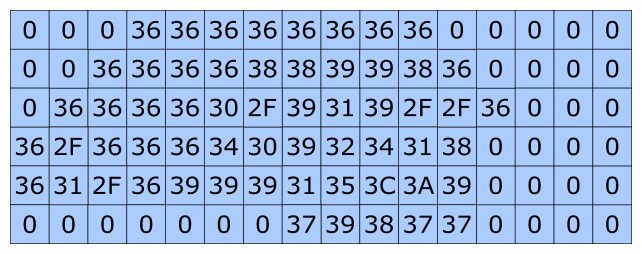
Next step is to add the palette offset found in the header to all non-transparent pixels. This gives us the palette index values to use when picking an color from the palette.
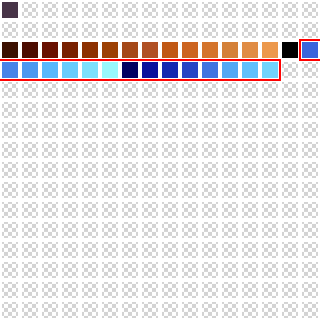
In this case, all indexes have color definitions in the files default palette (not always true). Below is all the colors defined in the default palette found in chan.hsq. I have marked out the 15 color indexes that can be used for this image.
Below is how it looks when we switch out the numbers for colors found in the palette. Not easy to see at this scale, but trust me, it Chani’s left eye.

All that is left is to crop out the three rightmost columns of pixels to get correct width.
(To not make this blog post too long, I have decided to not include an example of a compressed image. I hope my description makes it clear enough how it should be processed.)
Transparent rectangles
In several image files, you can find images that are just transparent rectangles. These are used in animations. Something I will talk more about in my next blog post about Dune.
And lastly, an exception!
Of course all the image files can’t follow the above rules. In the files dunes.hsq, dunes2.hsq and dunes3.hsq, the first word after the header should be skipped when processing pixels. I have no idea why or for what that data is used.
/Henrik