Building a LEGO portal
Early this year, the LEGO community I’m a member of was approached by Minivärlden. They asked if we were interested in displaying LEGO models at their premises during the summer. I thought this would be nice to do and volunteered to be the “coordinator” on the LEGO community side to make things easier for them.
During my talks with Minivärlden, they proposed the idea of having an arch out of LEGO bricks around the entry to the exhibition. At first I thought no one would have enough LEGO to build that, but then I remembered that I happen to have my LEGO community’s supply of 2x4 bricks in my storage. They would be perfect to use.
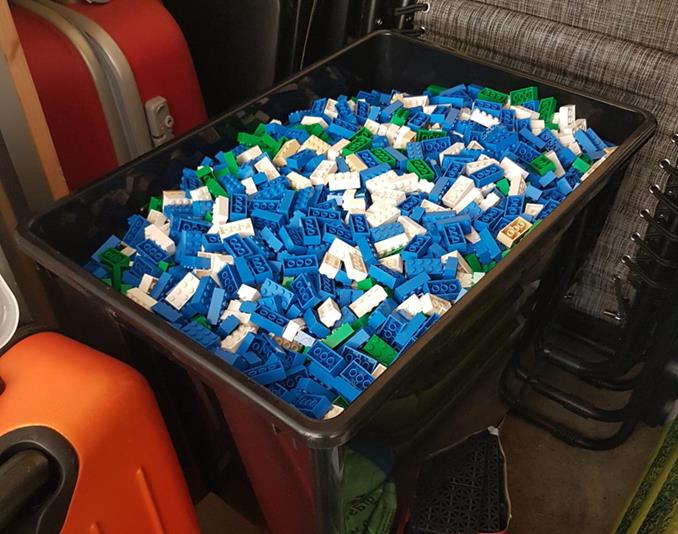
So after getting permission to use the bricks, I started to build just to see what I could create with the bricks. I decided to have a low ambition level. I had a fairly short time span to complete it and I had no idea how big of a build I could make with the bricks I had. (One thing you learn as a LEGO builder, is that a build always requires more bricks than you think.)
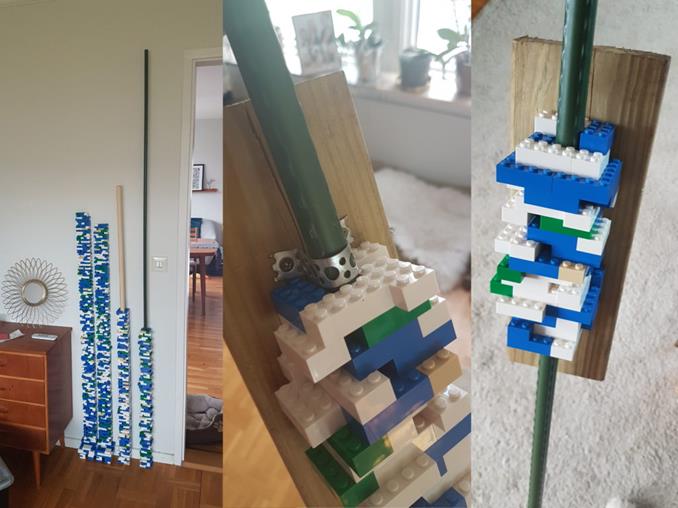
I started with what would be the columns of the arch. With the first version, I realized what I made would not be able resist much side force without breaking. My first design could easily be broken by a child pushing on it. I had to make the columns stronger somehow.
This lead me to experiment with non-LEGO. First I tried building a column around a broom handle, which added a lot of strength to the build. It was clear that having something in the middle to give strength was the solution to go with.
But the broom handle wasn’t perfect though, it was too short. A problem solved by my wife. She found long steel bars with the perfect dimensions in a garden store. (The bars had a diameter of 16 mm which is the same as a two studs wide LEGO brick.)
The left image below show three different test designs for the columns. There are two unsupported columns, one with broom handle and one with steel bar. Center image show how I planed to secure the columns to the wall and the right image shows how the attachment points were hidden.
Next part to solve was the top part of the arch.
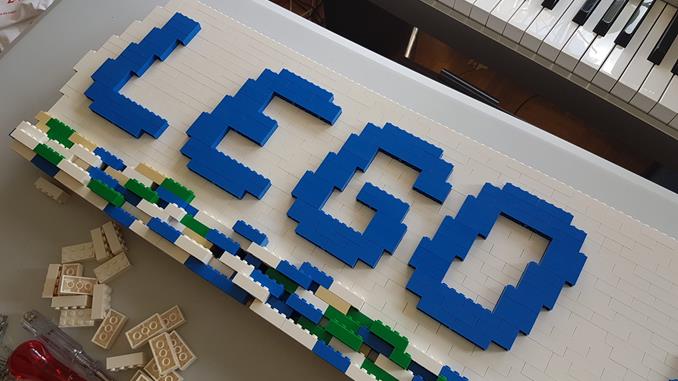
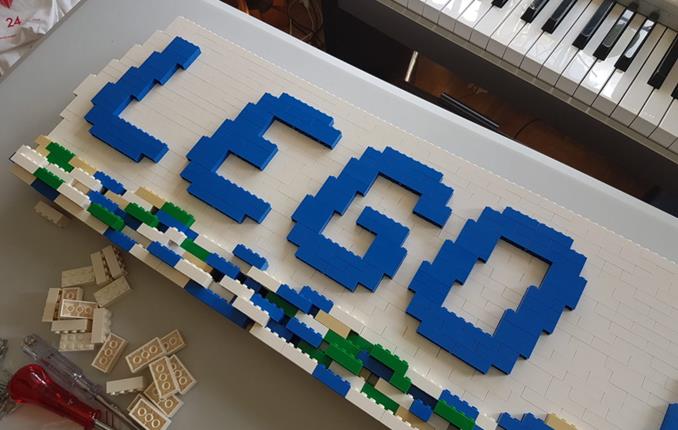
I knew using only 2x4 bricks would not result in anything anywhere near something that would be safe to walk under. I had thoughts about using long connected Technic bricks, but when Minvärlden ask if I could write out “LEGO fantasy” on the top, I abandon that idea. With that added weight, I decided to include non-LEGO on that part as well.
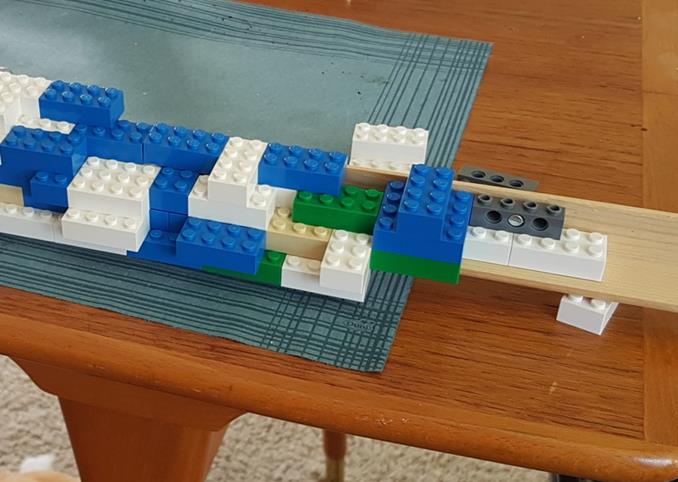
Going through my storage I found a perfect piece of wood to use as base for the top part. The piece has a L-shaped profile, which gives me a part that can easily be fasten to the wall and a shelf for the LEGO to rest on. The LEGO was attached to the wood with Technic bricks and screws.
Below you can see the whole arch installed at Minivärlden. Took about 4 hours to put up. I had to rebuild parts of the sign because I managed to drop it >.< Plus I decided to attach the sign to the wall with additional Technic bricks and screws. I was afraid that the sign would fall forward if someone shut the door too hard.
Minivärlden put up some painted plywood on the wall that I could connect the arch to. That plywood was a good idea from as it made the arch look better.
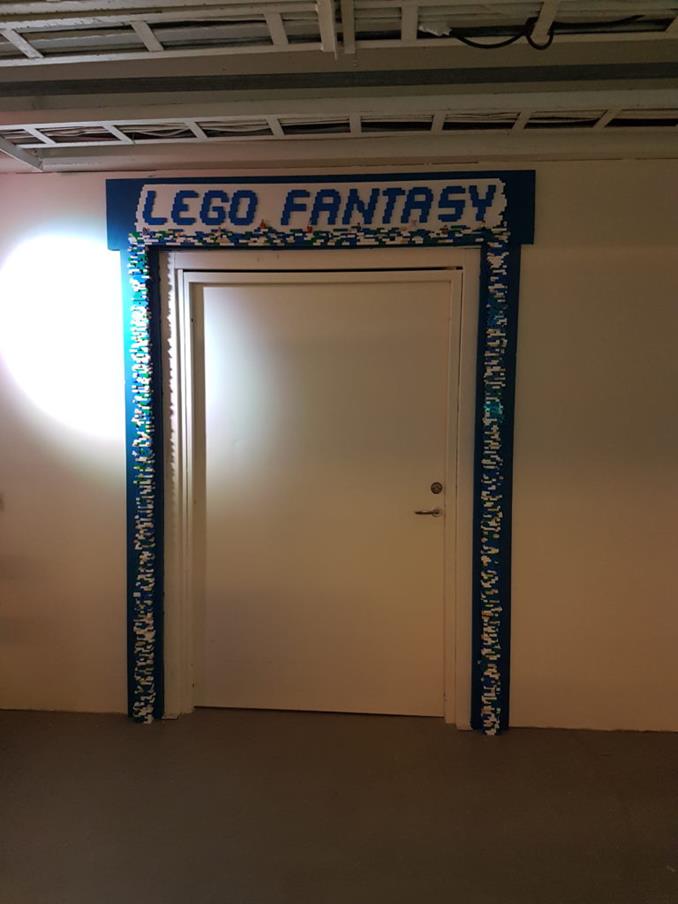
The columns and the top part were only connected through LEGO. I did not make any attempts to fasten the non-LEGO parts together. The reason behind this is that in case one column is knocked down I didn’t want the top part to be dragged down with it.
/Henrik